
A Texas homeowner usually starts thinking about window replacement and installation after the problem has already become impossible to ignore. A sash sticks, the glass fogs, or a late-spring thunderstorm leaves a damp line on the drywall below an aging aluminum frame. Meanwhile, the HVAC system keeps running against hot outdoor air and conditioned air escaping around the opening.
The window itself may be part of the problem, but the project is larger than choosing glass and color. Measurements, rough-opening condition, flashing, insulation, sealant, sequencing, and final inspection determine whether the new unit performs as intended. The U.S. Department of Energy notes that windows can represent 25% to 30% of residential heating and cooling energy use, which makes installation quality a practical building-performance issue, not a cosmetic detail. The DOE guide to energy-efficient windows also explains why the right product must be matched to the home and climate.
Table of Contents
- When a Window Replacement Project Actually Starts
- Measuring Existing Openings the Right Way
- Choosing Between Full-Frame and Retrofit Replacement
- Getting the Site Ready Before the Crew Arrives
- Inside the Installation Day Workflow
- Inspection and Timeline Coordination That Prevents Callbacks
- Warranty, Energy Performance, and Choosing the Right Supplier
When a Window Replacement Project Actually Starts
The project starts during the first walk-through, not when the delivery truck arrives.
Consider a common East Texas situation. A homeowner has a single-pane aluminum window installed decades ago. During a strong storm, water appears at the interior sill, then creeps into the drywall. The HVAC system seems to run continuously, and the room still feels warmer near the glass. By the time the homeowner calls for a quote, the visible leak has already raised a more important question: did the window fail, or did the surrounding wall assembly fail first?
Before discussing brands, I document each opening. I note the approximate age, frame material, operating style, visible staining, rusted fasteners, peeling paint, and the condition of the interior and exterior trim. I check the sub-sill for soft wood or swelling, look for moisture tracks, and inspect where the frame meets the wall. A simple incense test can reveal moving air around the perimeter, but it can't identify every water path.
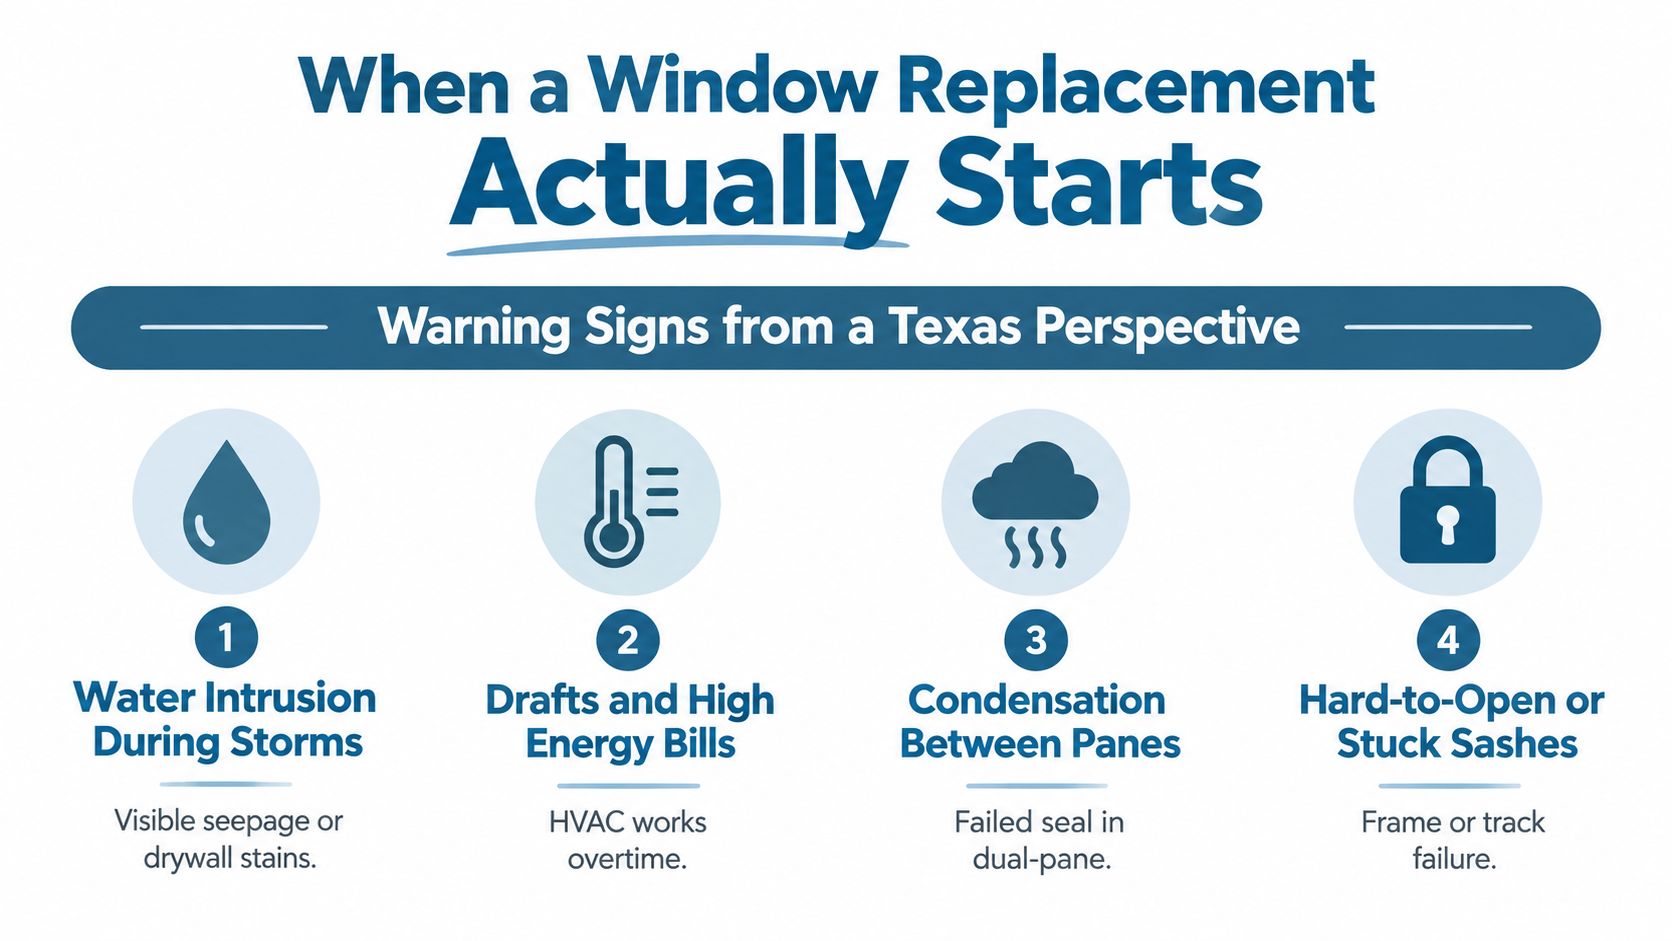
Warning signs from a Texas perspective
Watch for these symptoms:
- Failed glazing seals: Condensation or fogging between insulated glass panes usually indicates that the sealed glass unit has lost its insulating cavity.
- Water evidence: Peeling interior paint, stained drywall, swollen wood, or dampness near the sill deserves investigation before anyone orders a replacement.
- Air leakage: A draft near the frame can come from failed sealant, a deteriorated frame, or an opening that was never sealed correctly.
- Operating failure: A sash that binds, won't lock, or drops out of position may indicate frame distortion or track damage.
The window replacement warning signs guide can help organize that initial review, but a contractor still needs to determine whether the wall, flashing, and sill are contributing to the symptom.
Field rule: If a problem was visible during the first inspection and nobody records it, the project is already carrying callback risk.
A replacement quote should identify the condition of each opening, not just list a product line. That record gives the homeowner a basis for deciding whether an insert replacement is reasonable or whether the crew needs to open the wall and rebuild the weather-control details.
Measuring Existing Openings the Right Way
A replacement window is ordered from measurements that must reflect the opening as it exists, not as it was intended to exist. Older Texas homes can have openings that are out of square because of settlement, framing movement, past remodeling, or layers of added trim. A unit ordered from one convenient measurement may fit on paper and fail on site.
Take more than one reading
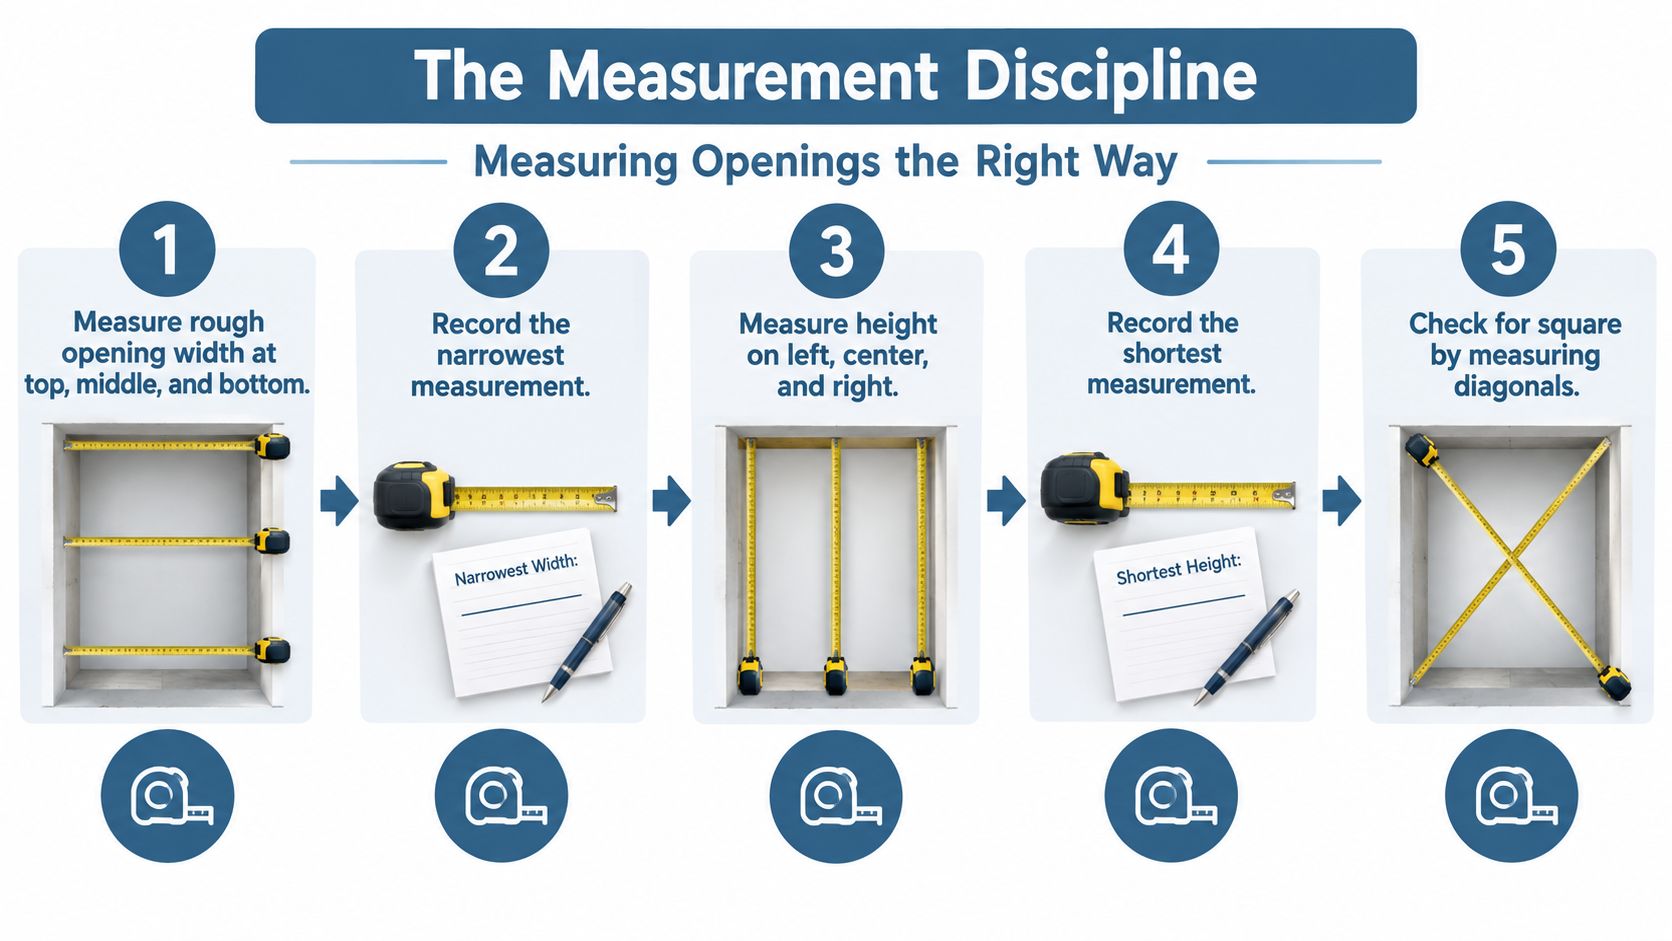
For width, measure the opening at the top, middle, and bottom. Record the smallest width, then repeat the process vertically at the left side, center, and right side, recording the shortest height. The smallest readings provide the controlling dimensions for ordering and allow the installer to plan the adjustment space needed for shims and movement.
Check the diagonals to identify an out-of-square opening. If the diagonal measurements differ, the crew must account for that condition while setting the unit. Ordering to the largest reading can leave no practical room to align the frame, and forcing a unit into a tight opening can bow the jambs or prevent the sash from operating freely.
Record the opening, not just the numbers
Measure the existing frame depth and the jamb-to-jamb interior clearance. Note the sill angle, exterior casing, interior stops, siding, stucco, brick, or fiber-cement interfaces. A four-foot level gives a more reliable view of sill conditions than a short torpedo level because it reveals slope and irregularity across a longer surface.
Vinyl and aluminum units also need room to accommodate thermal movement, especially in a hot, sun-exposed elevation. The required allowance depends on the manufacturer and product, so the installation guide must control the final order and field fit. The window size measurement guide is useful for organizing the process, but complex openings still require trained judgment.
Use a project sheet for every opening:
- Assign an identifier: Label it by elevation and room, such as east bedroom or rear living room.
- Create a photo record: Photograph the interior, exterior, sill, trim, and any damage.
- Draw the opening: Mark width, height, depth, sill condition, and direction of operation.
- Confirm safety requirements: Identify tempered-glass locations and openings that may need to satisfy egress requirements.
- Carry the notes into the order: Match each opening with its size, operating style, color, glass specification, and hardware.
That documentation prevents a common ordering error, applying one assumed configuration to every opening. A bedroom, bathroom, stair landing, and large living-room unit may each require different glass or operation details.
Choosing Between Full-Frame and Retrofit Replacement
The choice between full-frame and retrofit replacement should follow the condition of the opening. It shouldn't be made solely from a price difference or a promise that the crew can finish quickly.
A full-frame replacement removes the existing unit and frame down to the rough opening. That exposes the sheathing and sill, allowing the installer to inspect for rot, repair damaged materials, install a sill pan, reconnect flashing, and address the weather-resistant barrier. It also gives the homeowner more freedom to change exterior trim or correct a distorted opening.
A retrofit, or insert, replacement leaves the existing frame in place. The old sash and related components come out, and the new unit fits inside the retained frame. This approach usually creates less disruption and can preserve existing trim, siding, or masonry returns. The trade-off is that hidden damage remains hidden, the new glass area may be reduced, and the installer continues to rely on the old frame and its relationship with the wall.
| Factor | Full-Frame | Retrofit |
|---|---|---|
| Existing frame | Suitable when the frame is damaged, warped, leaking, or out of square | Suitable only when the retained frame is sound and stable |
| Wall and sill inspection | Exposes the rough opening, sheathing, and sill | Limits access behind the existing frame |
| Exterior finishes | May require trim or siding work | Usually preserves existing trim and cladding |
| Project scope | More invasive, with broader repair options | Faster and less disruptive when conditions are good |
| Design goals | Supports new trim profiles and larger opening corrections | Helps maintain the existing appearance |
Siding type matters. Stucco, brick, fiber cement, and wood lap siding each create different access and repair conditions. If the exterior is already being remediated, a full-frame scope often makes more sense because the crew can coordinate the opening with the surrounding work. If the frame is solid and the wall is dry, retrofit may be the sensible choice. The window installation types overview gives homeowners a useful vocabulary for discussing those alternatives.
Getting the Site Ready Before the Crew Arrives
Good site preparation removes obstacles before they become rushed decisions. The crew needs a clear working area inside and outside every opening, plus a reliable path from the delivery point to the house.
Clear the work zone
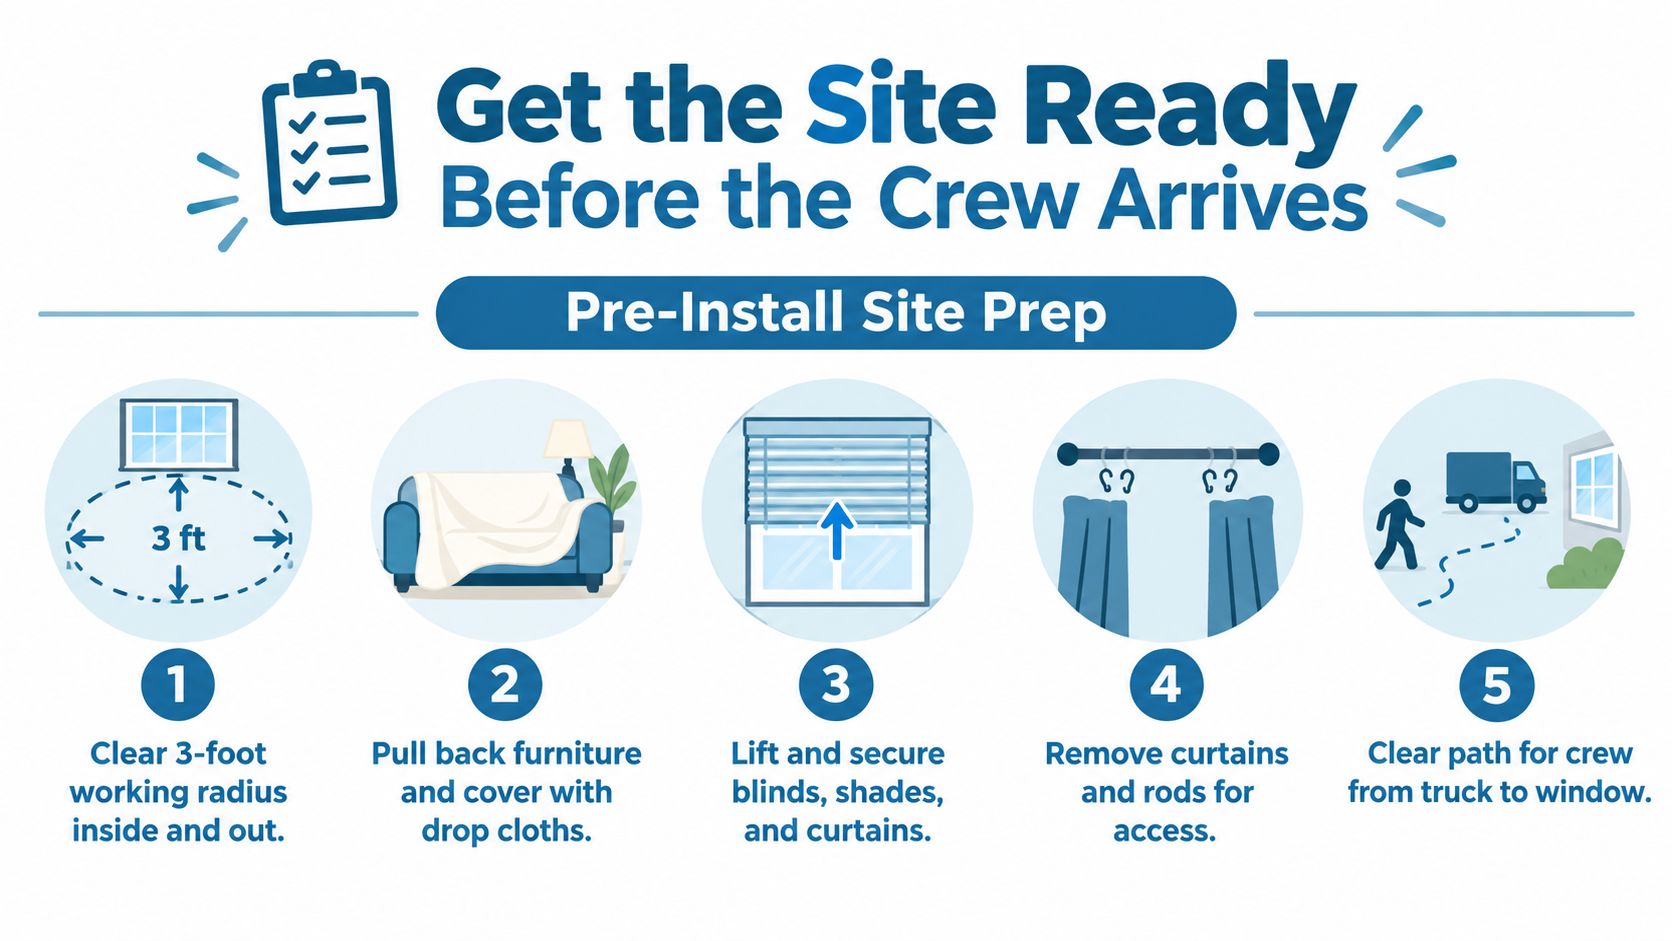
Create roughly a three-foot working radius around each window. Inside, move furniture, remove fragile objects, pull back curtains, and lift or remove blinds and shades. Cover items that can't be moved, but don't treat a drop cloth as a substitute for access. Installers need room to remove trim, handle glass, operate levels, and protect the sill.
Outside, move grills, planters, hoses, and other equipment away from the wall. Trim shrubs that block access, and identify irrigation lines or outdoor lighting near the openings. A ladder placed against an obstructed wall creates avoidable risk, and materials staged on delicate gardens can cause damage unrelated to the window.
Coordinate the other trades
Window installation should follow roofing work and rough exterior repairs that affect the opening. It generally belongs after rough mechanical work and before final interior paint and flooring, so trim adjustments and wall repairs don't damage finished surfaces.
Confirm the following with the project lead before delivery:
- Access: Provide gate codes, parking instructions, and a clear route from the truck to the work areas.
- Security: Tell the crew where pets will stay and which rooms require restricted access.
- Utilities: Identify the breaker panel if the project includes hard-wired window alarms or related equipment.
- Staging: Agree on locations for windows, flashing materials, tools, and debris.
- Weather exposure: Point out areas vulnerable to wind-driven rain or temporary opening protection.
Texas homes also deserve a specific exterior inspection. Check under eaves and around old frames for wasp nests, bee activity, and other pests before the crew begins. Heat can make a complicated access problem more dangerous, so schedule deliveries and staging with the actual site conditions in mind.
A short arrival-day meeting prevents confusion about what the crew is removing, what remains, where debris goes, and who handles drywall or trim repairs. Those decisions belong in writing before the first window is taken out.
Inside the Installation Day Workflow
A disciplined crew follows a sequence because each step protects the next one. Skipping preparation to save time usually moves the problem into the wall, where the homeowner won't see it until moisture or air leakage appears.
Remove and inspect
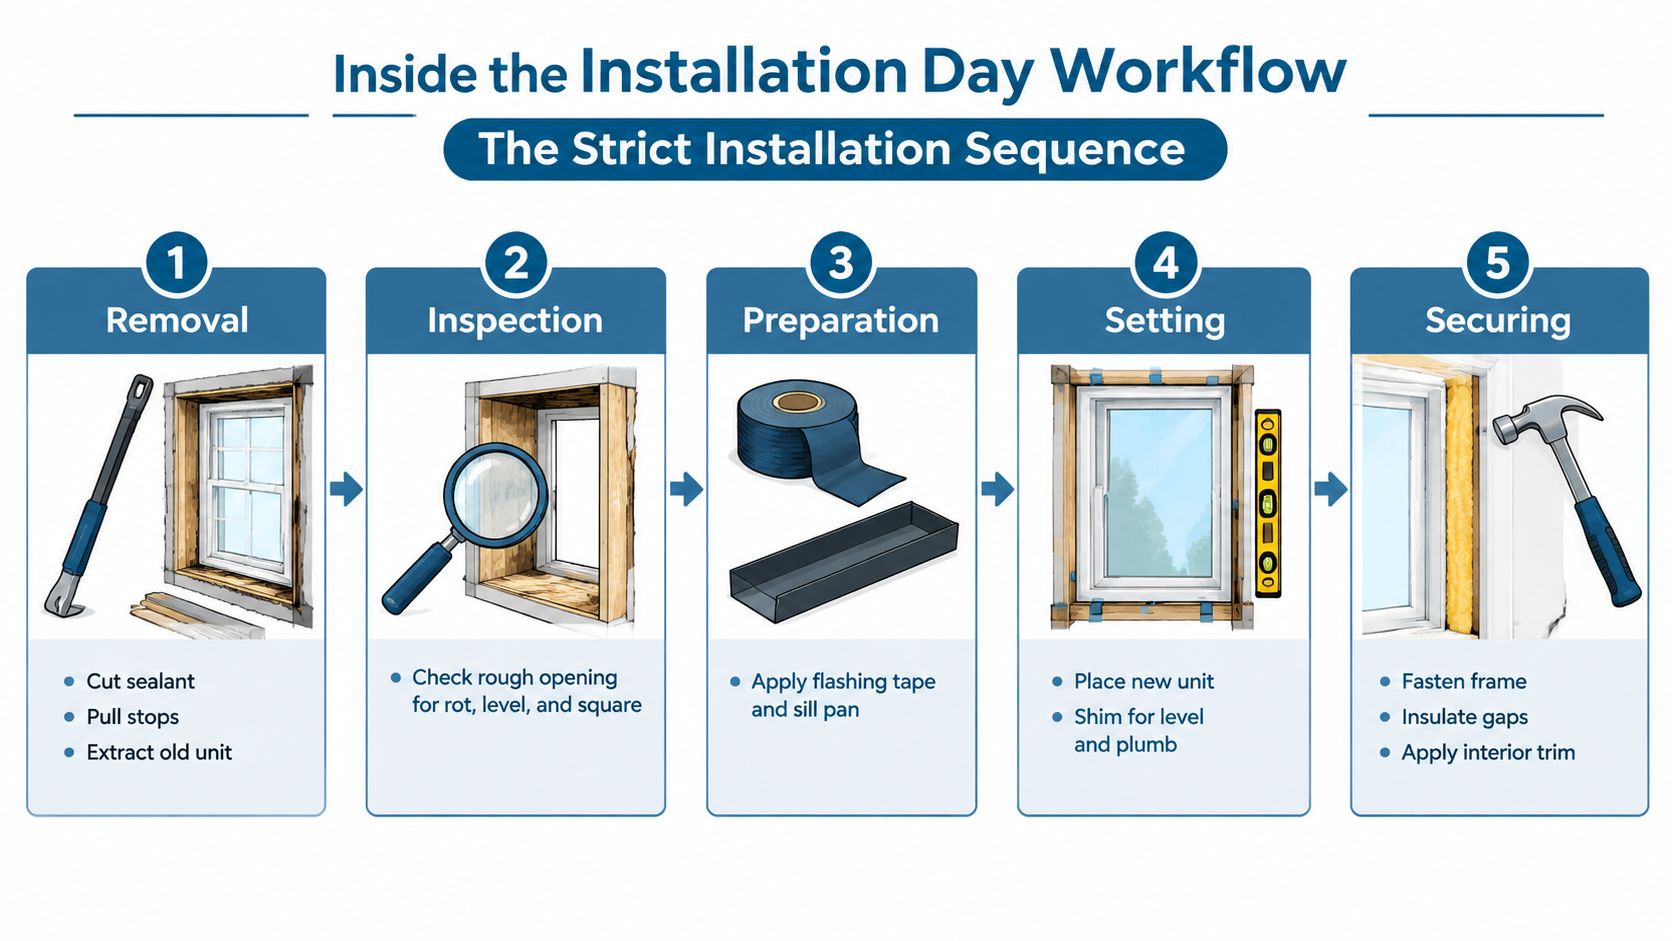
For an insert replacement, the crew removes the sash, stops, and jamb liners as specified by the system. For a full-frame project, installers cut sealant beads, remove interior stops or trim, and extract the entire frame without racking the surrounding drywall or siding.
The exposed opening then gets cleaned and inspected. The sill must be flat enough to support the pan and unit, and the crew checks for rot, level, plumb, and square. If damaged sheathing or framing appears, the installer should document it and explain the repair before covering it.
Build the water-control layer
A sloped sill pan with end dams gives incidental water a path back toward the exterior. The surrounding self-adhered membrane should connect with the wall's weather-resistant barrier using shingle-style laps, so upper layers overlap lower layers and water drains outward rather than behind the flashing.
The exact flashing sequence depends on the wall assembly and manufacturer instructions. The principle doesn't change: the sill, jambs, head, and adjacent barrier must form a continuous drainage and air-control strategy.
Set the unit without forcing it
The crew should dry-fit the window before applying final sealant or fastening. Installers then shim at the required load points and adjust the unit until it is level, plumb, and square. The frame shouldn't bow inward from over-tightened fasteners, because even a small distortion can make a sash bind.
Fastening follows the manufacturer's pattern. Units with nailing fins are generally secured through the fin rather than through the visible frame face, while other replacement systems use specified frame fasteners. The order and spacing must come from the product instructions and applicable code requirements.
Seal and insulate the perimeter
The exterior perimeter receives the specified backer rod and sealant where the joint requires it. Backer rod controls sealant depth and helps create a durable joint instead of allowing a thick mass of sealant to split or fail.
At the frame-to-wall gap, use low-expansion foam or the approved sealant system. Fibrous insulation is a poor substitute in this location because it remains air-permeable. The DOE-affiliated installation guidance emphasizes that alignment, air and water barrier continuity, and perimeter insulation matter as much as the window's glass specifications.
The final work includes trim installation, operator adjustment, lock checks, and a sash test. Every unit should open, close, lock, and release smoothly before the crew leaves.
Inspection and Timeline Coordination That Prevents Callbacks
A finished window can look excellent from across the room and still have a serious installation defect. The final inspection needs to test movement, alignment, drainage, sealant, and the condition of the surrounding finish.
Use a room-by-room punch list
Start inside. Check the sill with a level, inspect the reveal around the sash, and operate every moving panel. Look for bowed jambs, daylight around the trim, damaged drywall, and compression marks where shims or fasteners may have distorted the frame.
Outside, inspect the sealant joint for full coverage and consistent tooling. Confirm that flashing laps shed water outward and that drainage weeps remain open. A weep that has been filled with sealant may look tidy, but it can prevent the unit from draining as designed.
Use this practical sequence for every opening:
- Alignment: Confirm level, plumb, square, and consistent reveal.
- Operation: Open, close, lock, tilt, and release each sash or panel.
- Drainage: Check sill-pan transitions, exterior weeps, and lower sealant joints.
- Insulation: Verify that the perimeter is insulated without excessive foam expansion.
- Finish: Inspect trim, drywall, paint, siding, and masonry for damage or unfinished transitions.
- Documentation: Photograph the completed opening and save the unit serial number with the room label.
Poor sequencing creates many avoidable disputes. Schedule window work after roofing and rough stucco or siding repairs, but before interior paint and final flooring. If painters arrive before the window crew finishes trim adjustments, the homeowner may pay twice for touch-up work.
Plan around Texas heat
Sealants and foams need suitable conditions to cure and adhere. The DOE discussion of common installation mistakes warns that efficient windows can still become drafty or develop condensation problems when installers use the wrong insulation or sealant, ignore instructions, or fail to manage water.
On very hot Texas days, the crew may need early-morning staging, shaded material storage, or a weather-based reschedule. Record the installation date, product information, glass specifications, and field photos before interior finishes conceal the flashing. Keep that packet with the warranty registration. It gives a service technician useful evidence instead of forcing everyone to reconstruct the project from memory.
Warranty, Energy Performance, and Choosing the Right Supplier
A lifetime frame warranty doesn't repair a missing sill pan or a bowed jamb. The supplier relationship matters because the product, measurement, installation method, and service response must work together.
For energy performance, review the NFRC label and compare U-factor and solar heat gain coefficient, or SHGC, rather than relying on brochure photography. U-factor addresses heat flow through the window assembly, while SHGC helps show how much solar heat enters. In a hot Texas market, SHGC selection deserves careful attention because solar exposure can dominate the comfort problem.
The DOE explains that glazing can admit widely different amounts of solar heat depending on coatings and tint, which is why one generic “energy-efficient” specification isn't suitable for every elevation. The DOE window guidance also provides climate-related savings guidance, including an estimate that ENERGY STAR-qualified upgrades can reduce annual household energy bills by 7% to 15%, or approximately $71 to $501, depending on climate and window type.
Ask about design pressure, tempered-glass requirements, manufacturer instructions, and the installation standard the crew follows. A supplier should be able to explain who owns measurement accuracy, how specialty glass is ordered, and how storm-damage service calls are handled after hail or wind events.
| Criterion | What to Ask | Red Flag |
|---|---|---|
| Measurement accountability | Who measures each opening, and who covers an incorrect size? | The salesperson measures quickly but no one accepts responsibility |
| Installer relationship | Are installers employees, trained subcontractors, or an unidentified outside crew? | The installation team is assigned after the contract with no qualifications provided |
| Labor warranty | Does the warranty cover labor and installation defects, or only the frame and glass? | “Lifetime” appears in large type while labor exclusions are difficult to find |
| Documentation | Will you receive serial numbers, glass specifications, installation photos, and care instructions? | No project packet or opening-by-opening record |
| Product ratings | Can the supplier provide NFRC information, U-factor, SHGC, and design-pressure details? | The proposal lists appearance and brand but not performance data |
| Change orders | How are concealed rot, trim repairs, and scope changes priced and approved? | Verbal pricing with no written authorization |
| Service response | Who handles adjustment, glass failure, and storm-related calls in Texas? | No named service process or local contact |
The DOE materials indicate that the U.S. replacement opportunity remains substantial, while the historical replacement flow has been limited. The same presentation identifies roughly 2.3 quads of potential annual residential energy savings from high-R solutions, including about 1.30 quads from heating and 0.94 quads from cooling. The DOE residential windows presentation supports a practical conclusion: product selection matters, but installation quality decides whether the home receives the product's intended benefit.
For homeowners comparing options, low-e storm windows also deserve a place in the conversation. DOE-affiliated research reports that they can reduce residential heating and cooling consumption by 12% to 33%, making them a potentially lower-disruption alternative where the existing frame and wall assembly are sound. The storm-window research is particularly relevant when a full-frame replacement would disturb valuable trim or difficult exterior finishes.
Breaking Glass Co. supplies and installs residential and commercial windows and doors, provides measurement and ordering support, offers Texas installation coverage, and ships products nationwide. Its product range includes vinyl replacement and new-construction windows, European tilt-turn windows, and related installation and warranty support, so homeowners can ask for a project-specific quote tied to the actual opening conditions.
Before you approve a window project, ask Breaking Glass Co. to review each opening, confirm the replacement scope, and provide a quote that accounts for measurement, flashing, installation, and warranty support. Visit Breaking Glass Co. to request a same-day quote and discuss a window replacement plan suited to your Texas home.