
You've removed the old window, the opening is exposed, and the replacement unit is sitting nearby. A job can go from routine to expensive. A window may look sealed after the trim goes on, yet a missed sill detail, distorted frame, or discontinuous air seal can leave the wall vulnerable to drafts, water intrusion, and callbacks.
The best window installation steps treat the window and wall as one weather-control assembly. ASTM E2112 formalizes core practices such as verifying the rough opening, filling the opening gap, and protecting materials during installation. Those details matter because windows account for about 3% of total U.S. energy use, or 2.8 quads, and residential heating and cooling losses through windows represent about two-thirds of window-related losses across sectors, as reported by Lawrence Berkeley National Laboratory's window energy analysis.
Table of Contents
- Preparation and Safety Protocols
- Removing the Old Window and Inspecting the Opening
- Setting and Securing the New Window Unit
- Flashing and Air Sealing for Climate Control
- Trim Installation and Final Weatherproofing
- Final Inspection and Performance Verification
Preparation and Safety Protocols
Good installation starts before the first piece of trim comes off. Confirm the product, handing, size, glazing package, fastener requirements, and manufacturer's installation instructions. A replacement window that's been ordered for the wrong opening can't be rescued with more shims, and a correctly sized unit can still fail if the wall system calls for a different flashing or sealant approach.
Set up tools where you can reach them without climbing over debris. A practical kit includes a tape measure, combination square, long level, pry bar, utility knife, drill and driver, approved screws or nails, shims, backer rod, compatible sealant, flashing tape, a sill pan or pan-forming material, low-expansion window foam, safety glasses, gloves, and drop cloths. Keep the installation instructions open rather than relying on memory. Product details differ, especially around fastening locations, sealant compatibility, and perimeter clearances.
Measure the rough opening before demolition
Measure the opening in several locations for width and height, then compare those measurements with the unit dimensions and the manufacturer's required clearance. Don't assume the visible interior casing tells you the true rough-opening size. The wall may contain added trim, furring, replacement liners, or concealed damage.
Record the opening condition, not just its dimensions:
- Confirm the geometry: Check whether the sill and head are level and whether the jambs are plumb.
- Check the substrate: Look for soft wood, loose sheathing, deteriorated masonry, and old sealant that won't provide a sound bond.
- Plan the weather path: Identify how existing housewrap, building paper, siding, or masonry flashing will connect to the new window.
- Protect the room: Cover floors and furnishings, isolate the work area, and use a controlled path for carrying glass and debris.
Height work deserves the same planning as the installation itself. Use stable access equipment, keep both hands available when handling the unit, and don't carry glass through a cluttered opening. Wear cut-resistant gloves when appropriate, but remember that gloves don't make a cracked or awkwardly balanced window safe to handle.
Older homes add another concern. Paint disturbed during trim removal may contain lead, so follow applicable lead-safe work practices instead of dry-scraping or creating uncontrolled dust. Bag waste as you go, and use a cleanup plan suited to the material. For broader guidance on organizing and removing renovation waste, homeowners can review these articles for service pros, which include practical process ideas for keeping work areas orderly.
Removing the Old Window and Inspecting the Opening
Removal is an investigation, not a demolition contest. Start by identifying whether the job is a pocket replacement or a full-frame installation. A pocket replacement usually leaves the existing frame in place, while a full-frame tear-out exposes the rough opening and gives you a better opportunity to correct hidden water damage, insulation gaps, and poor flashing.
Remove interior stops carefully with a stiff putty knife and a pry bar. Score painted joints first so the surrounding casing doesn't tear away with the stop. Label reusable pieces, support the sash while releasing it, and keep fasteners from dropping into the wall cavity. If the old window has removable sashes, take out the operating panels before disturbing the frame. That reduces weight and gives you a clearer view of the jamb attachments.
Exterior trim often hides the most important evidence. Cut old sealant, remove fasteners one at a time, and avoid prying directly against fragile siding or stucco. If the frame is being discarded, controlled cuts can make removal easier, but don't cut into framing, wiring, plumbing, or concealed flashing.
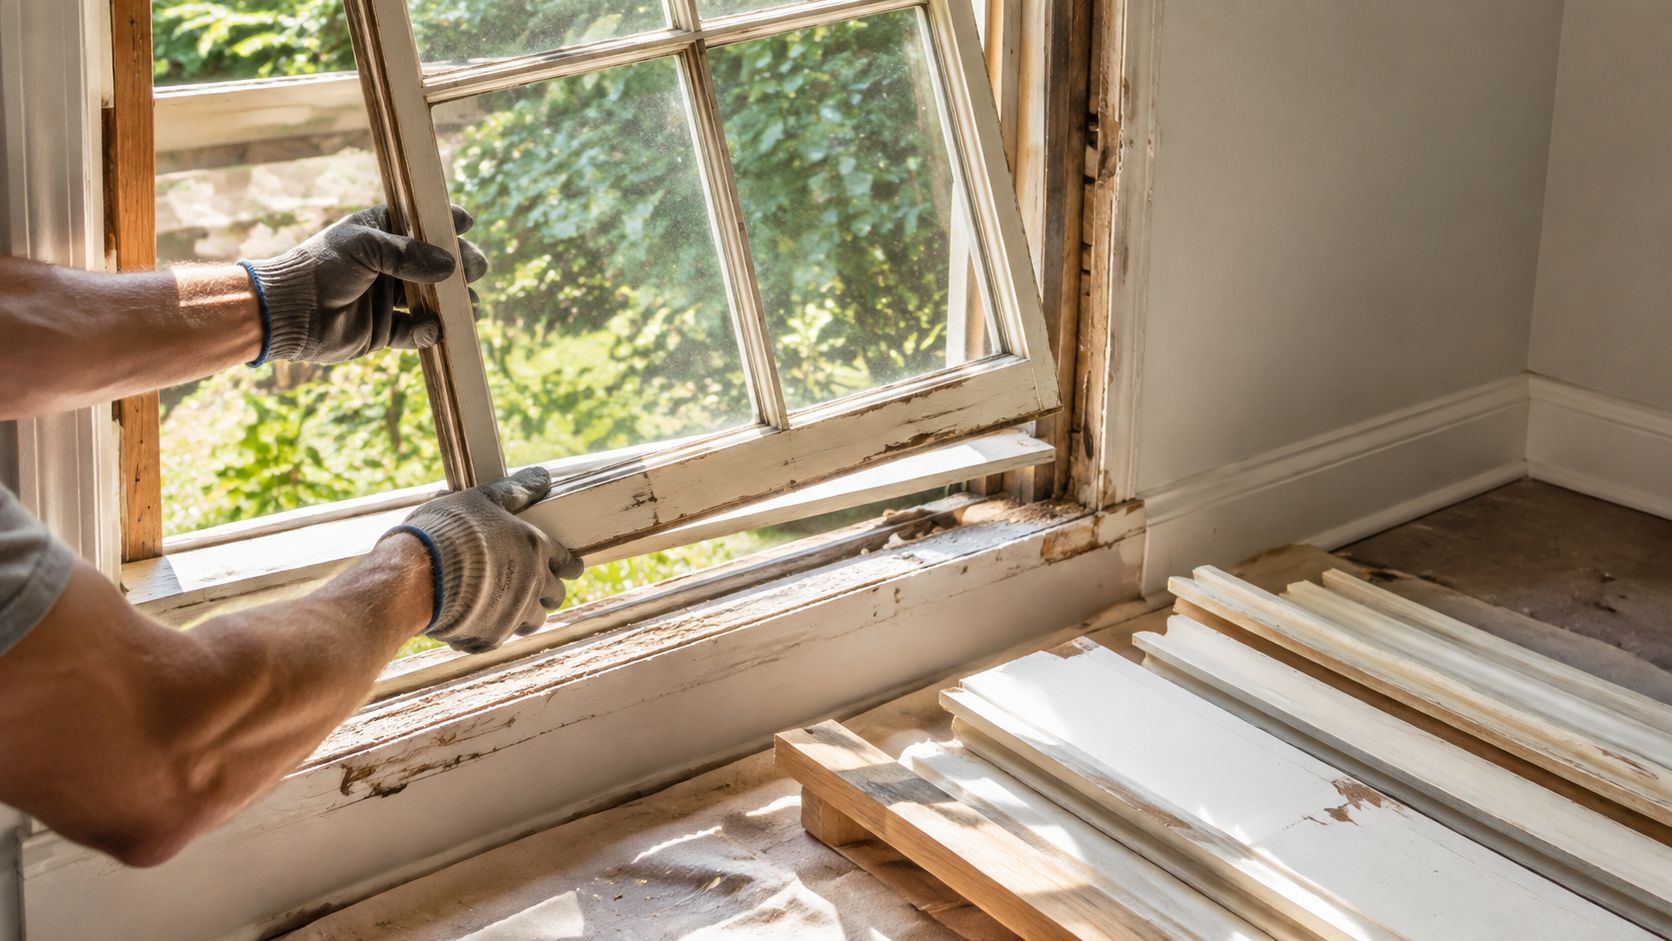
Inspect before you rebuild the opening
With the unit out, remove loose insulation, failed sealant, and deteriorated wood. Probe the sill and lower jambs with a screwdriver. Sound framing resists the tool. Soft material, staining, fungal growth, or fastener corrosion indicates that the opening needs repair before a new window is installed.
Check the opening in the order that affects the final fit:
- Level: Place the level along the sill and head. Correct uneven framing with approved repair material rather than burying a slope under random shims.
- Plumb: Check both jambs. A leaning jamb can make the sash bind even when the unit appears level.
- Square: Compare diagonal measurements. A mismatch signals a racked opening.
- True and stable: Look for bowed studs, loose sheathing, shifted masonry, or framing that moves under hand pressure.
Manufacturer guidance calls for confirming that the opening is level, plumb, square, and true before setting the unit. It also emphasizes full sill support and warns that frame twisting or bowing can compromise operation and the seal line, as detailed in the AAMA installation instructions.
Don't close the wall around a mystery. Photograph concealed damage, document repairs, and dispose of removed materials safely. A clean work area also reduces the chance that broken glass, nails, or contaminated dust remains behind the finish. Homeowners planning a larger renovation can use these construction debris removal methods for homeowners in 2026 as a reference for sorting and clearing waste.
Setting and Securing the New Window Unit
A dry fit tells you more than a tape measure. Place the window into the prepared opening without sealant and check the fit at the sill, jambs, and head. The manufacturer's guidance commonly specifies perimeter clearances of about 1/4 inch, but use the product instructions for the exact requirement. The unit should enter without force and leave enough room for shimming, insulation, and movement management.
Before setting it permanently, check the sill support. The sill must carry the window continuously or at the prescribed structural points. If it sags, rotates, or bears unevenly, the frame can distort after the fasteners are tightened.

Dry-fit, position, and shim
Prepare the sill seal or approved sealant according to the window design. Some systems use a sill pan and sealant; others rely on a fin seal or a manufacturer-specified membrane. Don't substitute a generic bead where the instructions require a formed pan or a particular bonding surface.
Set the unit with the sash closed and locked when the instructions call for it. Center the frame in the opening, then bring it to level and plumb with shims placed at structural support points. Avoid using shims in a way that bows the jambs inward. The goal is a supported frame, not a frame wedged until it can't move.
Use a repeatable sequence:
- Support the sill: Place durable shims where the unit transfers load, and verify that the sill remains straight.
- Align the jambs: Check each side for plumb while keeping the frame centered.
- Secure gradually: Install the specified fasteners without fully tightening one side before the other.
- Recheck the sash: Open, close, and lock the unit as installation progresses.
Fastener placement depends on the window type. Follow the supplied pattern through the nailing fin or frame, and use the approved fastener length and material. Overdriving a fastener can pull the frame out of alignment or damage the fin. Underdriving can leave the unit loose.
Practical rule: A window that operates smoothly before insulation and trim is far easier to correct than one that binds after the opening has been concealed.
Keep checking the diagonals and the perimeter gap as you secure the unit. For additional product context before choosing a replacement or new-construction configuration, compare the different window installation types and match the installation method to the wall condition.
Flashing and Air Sealing for Climate Control
A window can be level, plumb, and fully fastened yet still leak at the wall. The risk sits at the window-wall interface, where the frame, sill, jambs, head, sheathing, flashing, insulation, and interior air barrier must connect without leaving a path for water or air.
Energy performance depends on that connection. A high-performing unit can lose much of its practical value when air bypasses the frame or water reaches vulnerable sheathing. In demanding Texas conditions, intense sun, heat, wind-driven rain, and cooling-driven pressure differences expose weak transitions quickly.

Build the water-control layer
Flashing must form a drainage system, not a strip of decorative tape. The sill detail should direct incidental water outward. Side flashing should connect to the sill, while head flashing overlaps the side layers so water moves over the assembly instead of behind it. That shingle-style sequence gives water a planned route out of the wall.
Work only on clean, dry, compatible surfaces. Stretch flexible flashing only as directed, press it firmly into corners, and remove wrinkles that could form channels behind the tape. Tie the new flashing into the existing water-resistive barrier. Where the wall uses housewrap or building paper, preserve its drainage path rather than sealing layers together and trapping moisture.
The National Research Council Canada study on water penetration through wall-window interfaces examines how these junctions resist water entry. Wall moisture behavior also depends on partial pressures, vapor movement, assembly design, and climate exposure. A thick caulk bead cannot compensate for discontinuous flashing or a blocked drainage path.
Close the air path without deforming the frame
Once the unit is secured and still operates correctly, seal the gap between the frame and rough opening. Use low-expansion window foam or a sealant approved for the materials and gap size. Fill the space continuously, but do not pack it aggressively. Foam that expands against the frame can bow the jambs and create operating problems.
The interior seal should connect the frame to the interior air-control layer. Use backer rod in deeper joints when it provides the correct sealant geometry. It does not replace a continuous primary seal, and it should not leave voids at corners, shims, fasteners, or mull joints.
A Lawrence Berkeley National Laboratory study of air leakage in newly installed residential windows evaluated leakage against the common benchmark of 0.50 cfm per linear foot of crack. The practical inspection standard is simple: the work should control air leakage after completion, not merely appear sealed from the room.
Sealant performance also depends on temperature and application conditions. Use this cold weather caulk guide when selecting and applying products in difficult temperatures. For comfort complaints, review how to stop drafts from windows. Run a hand, smoke pencil, or other suitable check along the interior perimeter, especially at corners and transitions. If the air barrier stops at a shim, fastener, corner, or unsealed mull joint, the assembly still has a bypass.
Trim Installation and Final Weatherproofing
Trim should protect the window-wall interface, not hide incomplete weatherproofing. Before fitting exterior casing, brickmold, or replacement trim, inspect flashing and sealant for poor adhesion, wrinkles, open corners, and gaps. Choose fasteners for the substrate, and place them where they will not create new paths for water.
At the exterior, preserve the drainage established at the sill. A sill extender or sloped sill must direct water away from the wall. Avoid a flat ledge that holds dirt against the frame and keeps the joint wet. Seal the connections between trim, window, and wall, while keeping designed drainage and weep paths open.
Seal joints with control
A neat bead can still fail. Sealant must bond to both adjoining materials, remain compatible with the window finish and flashing, and be tooled into full contact without voids. Use backer rod in joints deep enough to need it, and keep sealant off surfaces that must drain or remain accessible.
Interior casing and stops belong in place after the sash operates correctly. Keep fasteners clear of moving parts, balances, weatherstripping, and insulated-glass edges. Replacement casing can improve the finish when old trim is damaged, but it cannot correct a frame that is out of alignment.
Give every corner a close inspection. Failures often start where vertical and horizontal materials meet. Field-mulling joints need continuous sealing because a small discontinuity can admit water behind the trim. Smooth the finished bead, remove excess sealant, and clean the glass without scratching its coating. In hot, wet climates such as Texas, these small details determine whether the opening drains outward or stores moisture at the wall interface.
Final Inspection and Performance Verification
The final inspection should answer two questions. Does the window work as a mechanical unit, and does it connect continuously to the wall's water and air-control layers? A clean appearance answers neither question by itself.
Open and close every sash, engage each lock, and test tilt latches or restrictors where provided. Watch for binding at one corner, uneven reveal lines, a lock that only engages when the sash is forced, or a frame that moves when the hardware operates. Those symptoms usually point to alignment, support, or fastening problems.
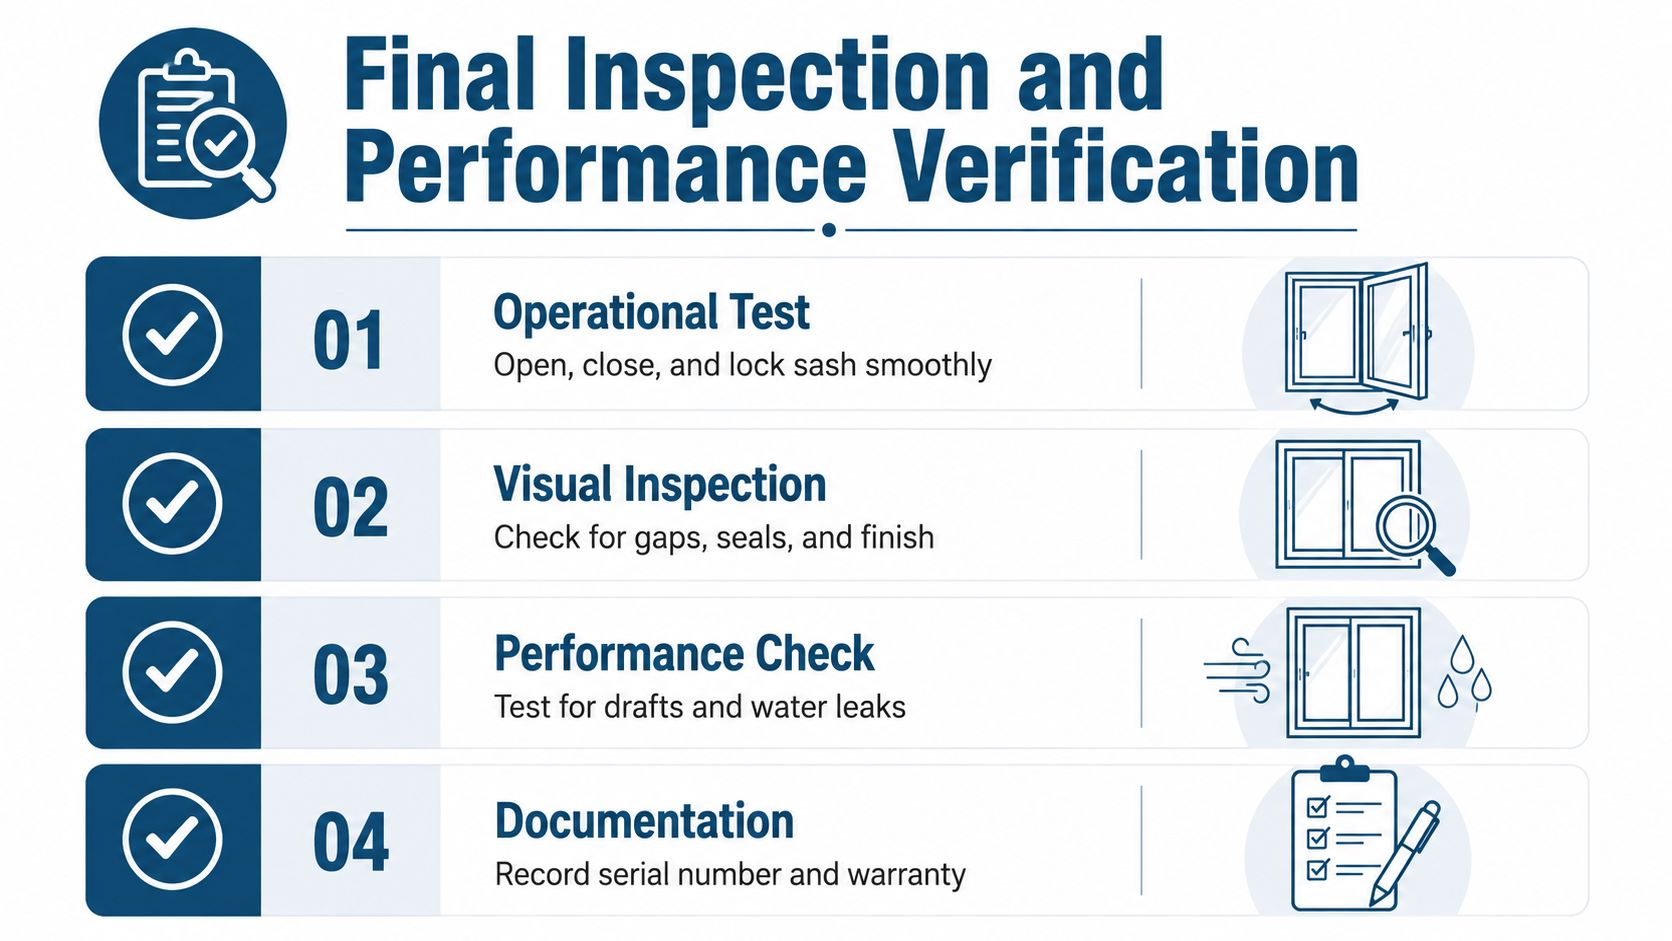
Sign off only after these checks
- Operation: Confirm smooth movement, secure locking, and correct latch engagement.
- Glass and frame: Inspect for scratches, cracks, sealant contamination, damaged corners, and visible distortion.
- Weather barrier: Look at sill, jamb, and head transitions, then verify that exterior joints are continuous and drainage paths remain open.
- Air control: Check for drafts at the frame perimeter and use appropriate field testing when the project requires documented airtightness.
- Water resistance: Inspect after suitable wet-weather exposure or use a controlled test method appropriate to the assembly.
- Documentation: Record the product information, installation date, observed adjustments, and warranty materials.
For high-performance work, post-install field testing on a sample of units can identify a missed flashing or anchorage issue before finishes conceal it. Thermal performance also needs the right vocabulary. A practical explanation of U-factor versus R-value helps keep product selection separate from installation quality, because a better-rated window still needs a continuous, correctly executed interface.
ENERGY STAR estimates that replacing old single-pane windows with certified units can reduce household energy bills by up to 13% nationwide, and its guidance states that the federal tax credit can cover 30% of eligible costs up to $600 for envelope improvements including windows, as described in its window replacement savings and tax-credit guidance. The installation has to preserve the expected performance for those benefits to matter.
Breaking Glass Co. supplies and installs residential and commercial windows and doors, including measured replacement projects and new-construction packages across Texas, with products available for nationwide shipment. If your opening needs careful measurement, climate-appropriate product selection, and documented installation support, visit Breaking Glass Co. to request a quote and discuss the project before ordering.