
Most completed entries don't start with a drilled cylinder. In the U.S. Bureau of Justice Statistics study Victimization During Household Burglary, among unlawful entries into residences that were unoccupied when the incident occurred, offenders entered through an unlatched door or window in 39.5% of cases, and 17.2% involved an open door or window. A key was used in 7.9% of those cases, and 4.1% involved picking a lock or window. Occupied residences followed the same pattern in a different mix: 28.0% through an unlatched door or window and 27.0% through an open one.
That split should change how you spend the next weekend. Securing windows and doors is mostly latching, frame strength, and a map of which openings must still open in a fire. A premium cylinder on a soft jamb is the wrong first purchase.
Table of Contents
- Where Break-Ins Actually Start
- Mark Escape Openings Before You Harden
- How to Reinforce Locks Frames and Tracks
- Hardware Glass and Frames Worth Specifying
- Sensors Lighting and Habits That Stay On
- Decide What to Fix This Week
Where Break-Ins Actually Start
Forced entry often means damaging the door or removing it. In the Bureau of Justice Statistics study, window screens were damaged or removed in 11% of forcible-entry incidents at occupied residences and 9% at unoccupied residences. A screen may slow a hand, but it does not secure the opening.
Read the entry methods as a work order. The first action is in the last column.
| Entry method | Unoccupied homes | Occupied homes | First action |
|---|---|---|---|
| Unlocked door or window | 39.5% | 28.0% | Latch every operable sash and door before leaving or sleeping |
| Open door or window | 17.2% | 27.0% | Close the opening fully so the lock can engage |
| Key used | 7.9% | Same rekey rule | Rekey after moves, contractors, or lost keys |
| Lock or window picked | 4.1% | Same upgrade order | Upgrade only after the opening actually latches |
| Door damaged or removed | Most common forcible method | Most common forcible method | Anchor the strike and hinges into framing |
| Window screen damaged or removed | 9% of forcible entries | 11% of forcible entries | Treat the screen as a delay, not a lock |
One evening with a pencil
Walk every ground-floor door and window, both side yards, and the garage-to-house door. Mark each opening locked, latched, open, or unable to close. A concealed patio slider behind a gate deserves the same attention as the front entry.
Check what is already installed:
- Short strike screws: Screws about an inch long stop in the jamb trim rather than reaching the stud.
- Soft or split jambs: Press the wood beside the strike. Crushed grain means the frame may give way before the bolt does.
- Loose tracks: A slider that rocks in its channel can lift, even with a bar in the track.
- Glass beside a thumb-turn: If the turn is reachable through a sidelight, a better cylinder alone does not solve the problem.
Practical rule: Latch openings that already close tonight. Reinforce weak frames this weekend. Save new glass or a multipoint unit for openings that will not sit square.
Picked locks make up a small share of the table, so a high-security cylinder is rarely the first purchase. Daily latching and a sound frame do more for an opening that is otherwise left unsecured. The same basic priority appears in a security guide for Melbourne homeowners. Finish marking the openings before buying hardware.
Mark Escape Openings Before You Harden
Buy nothing until every sleeping room and basement bedroom is on a sheet of paper. HUD egress guidance says exit doors must not require a key, tool, or special knowledge to open from the inside, and it bars interior window locks that need those same actions. Fixed or key-operated bars can block a designated escape. Local guidance drawn from the 2021 International Residential Code says sleeping rooms and basements generally need an operable emergency escape and rescue opening that opens from inside without keys, tools, or special knowledge.
A double-cylinder deadbolt on the only exit fails that test. So do screws driven through a sash, and so do bars unless they have a listed interior release that needs no tool.
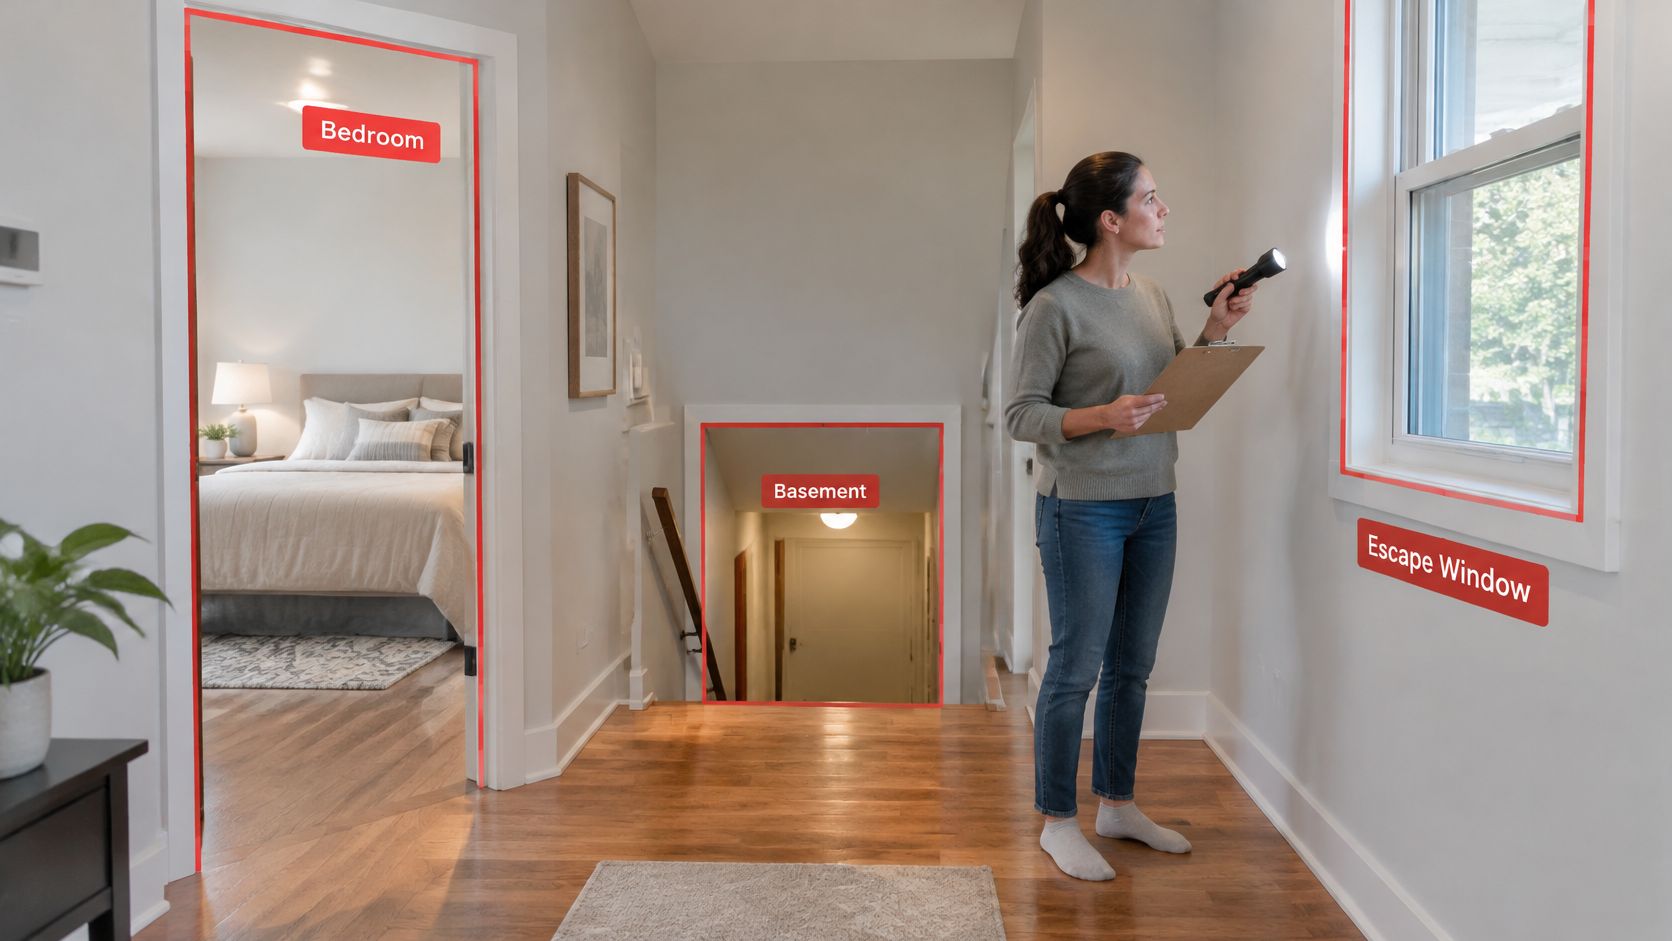
How to mark the map
- List every sleeping room, including a basement bedroom, and the opening you would use at night.
- Mark each required opening rapid-release. A waking adult must open it from inside with one motion and no key.
- Leave at least one such opening in every sleeping room. Don't trade it for a prettier lock.
- Everything else can take secondary hardware. Hall windows, the garage-to-house door, and non-sleeping windows that aren't the escape path can take sash pins, track blocks, and protected cylinders.
- On a replacement, compare clear opening, sill height, and release method with the unit coming out. A tighter tilt-turn or a higher sill can fail inspection even when the glass is stronger.
- On upper floors, use a listed window opening-control device for fall prevention. Don't run screws through the sash.
- In Texas, ask the local building official which rooms are designated escapes before a rough opening changes. Write the release method on the install checklist so a later add-on doesn't undo it.
Below-grade rooms are the easy place to get this wrong. A secure well is useless if the sash won't clear, which is why daylight windows in a basement belong on the same sheet as the lock notes.
The most secure-looking hardware can be a life-safety defect. A key you can't find at 2 a.m. is not a security upgrade.
Keep the finished map on the fridge. Every lock step after this one gets checked against it.
How to Reinforce Locks Frames and Tracks
UK College of Policing neighbourhood crime guidance reports roughly 38% of residential burglary entries involved doors being forced or pried, and states about six in ten completed burglaries occur through open doors or windows. Latch checks come first. A tug test on a door that never closes tells you nothing.
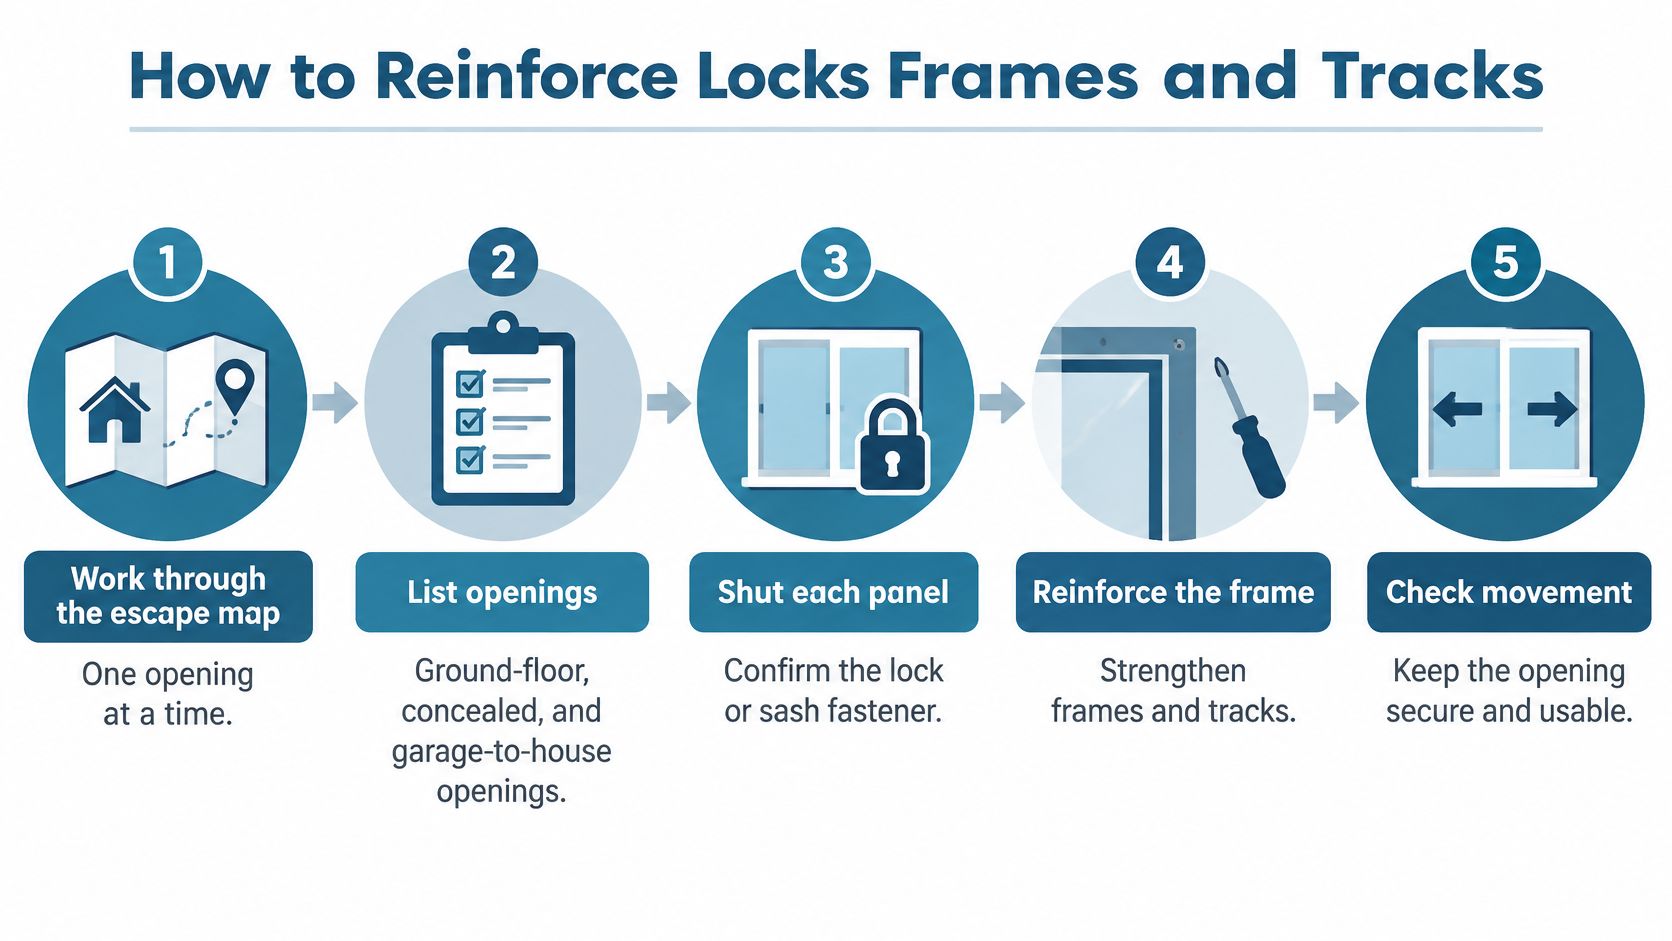
Fasteners and tests, in order
- List ground-floor openings, concealed side-yard openings, and the garage-to-house door.
- Shut each panel. Confirm the lock or sash fastener meets. Summer heat in Texas racks slabs and sashes. A deadbolt in the box doesn't secure a door that stops an eighth of an inch proud.
- On exterior hinged doors, keep the passage latch and add a deadbolt with a dead-latching plunger. The little plunger beside the latch bolt stops a card from slipping the latch when the door is closed.
- Pull the short strike screws. Drive screws about 3 inches long through the strike into structural framing. Do the same at the hinges, at least one long screw per hinge leaf into the stud.
- On outward-swinging doors, fit non-removable pins or security studs so the leaf can't be lifted off the hinges from outside.
- Where glazing lets a hand reach the thumb-turn, use a protected or key-operated cylinder only on doors the escape map has cleared.
- On sliders, set a track block or auxiliary foot lock, then add anti-lift hardware at the head so the panel can't be raised out of the track.
- On double-hung windows, replace a loose cam lock so the rails pull tight. Pin the meeting rails only on openings the map has cleared.
- Tug and pry at the strike, the hinges, and the track. If the jamb crushes or the sash lifts, stop. Repair the frame. Don't buy another cylinder.
The common failure is a strong lock on short screws, rotten wood, or a loose track. The cylinder is still shiny when the jamb splits. Spend where movement shows: longer screws bite framing, shims take the rock out of a sash, anti-lift clips keep a slider honest. A premium cylinder on a soft jamb is the wrong spend.
French and double doors need the inactive leaf bolted into the head and sill, with a latch into the other leaf treated as a convenience. A multi-point locking system for French doors spreads that load after the frame is sound. Commercial openings have their own heavier-duty spec path, such as triple lock doors for commercial premises; the residential rule stays the same. Three bolts into a hollow metal frame still lose if the frame isn't anchored.
A short install walk-through helps if you want to see strike screws and anti-lift clips in place before you open the toolbox.
If the locked assembly moves under a firm pry, the next dollar goes into wood, shims, or a new frame before a higher-grade keyway.
Hardware Glass and Frames Worth Specifying
Match the opening to a row. One lock for every hole in the house wastes money and can trap an escape path you already marked.
| Opening | Primary hardware | Frame or threshold | Glass choice | Common miss |
|---|---|---|---|---|
| Hinged entry door | Deadbolt plus dead-latching passage latch | 3-inch screws into framing; reinforced strike | Laminated if sidelights are beside the lock | New cylinder on the old short screws |
| Double or French doors | Multipoint or flush bolts plus a deadbolt on the active leaf | Astragal and hinges screwed into framing | Laminated in panels near the lever | Inactive leaf left unbolted |
| Sliding patio door | Auxiliary foot lock and a track block | Anti-lift blocks at the head | Laminated, or filmed existing pane as a delay only | Bar in the track but panel still lifts out |
| Double-hung window | Sash lock that fully cams the rails | Sound jamb and meeting rail | Laminated where the sash is a forced-entry target | Pinning a required escape window shut |
| Sliding window | Secondary lock plus a track block | Anti-lift clips | Same delay options as patio glass | Lock added while the sash still rocks |
| Tilt-turn window | Multipoint espagnolette, tilt for vent and turn to lock | Square frame so all points meet | Insulated laminated where specified | Leaving it tilted and calling that locked |
Two openings, two rows
Say the front door has a sidelight within arm's reach of the thumb-turn. Ordinary annealed glass breaks into a hole you can reach through. Tempered glass is a safety break pattern, not burglary resistance. The row you want is laminated glass in that sidelight plus a protected interior operator. Security film on a fixed pane is a delay. It isn't a latch. Where the spec calls for a rated lite, impact-resistant glass is the product conversation, after the strike is already in the framing.
Say the entry slab bows in afternoon sun and the deadbolt misses the strike by late July. A better cylinder won't pull a racked bottom rail into the weather seal. That row is multipoint hardware and an adjustable threshold on a fiberglass slab, because heat, sun, and driving rain move the door and the wood frame around it. A single bolt at knob height leaves the top and bottom free to pry.
Tilt-turn earns its own row for small rooms that get propped open. Tilt vents while the points stay available. Turn locks them. Leaving the sash tilted and calling it secure is the miss in the last column.
When the frame is the spec
If the opening is too far out of square for new hardware to meet at every point, the frame is the first line item. Shim, sister the jamb, or replace the unit. I would not spend on an espagnolette that can't throw. That's the point where a measured quote beats another trip to the lock aisle. Write down clear opening, handing, and whether the room is on the escape map before anyone orders glass.
Sensors Lighting and Habits That Stay On
After the openings latch and the frames hold, add a layer. Don't add another lock. Research summarized by Nottingham Trent University found that a package of window locks, interior timed lighting, double door locks or deadbolts, and sensor-controlled exterior lighting provided approximately 49 times greater protection against burglary with entry than no security.
The multiplier is the package, because each element covers a different failure. Locks resist the push. Timed interior lighting makes an empty house read as occupied. Sensor-controlled exterior light strips concealment from the approach. A single premium device with the deadbolt left back earns none of that.

Install, then prove it works
- Map the paths: Doors, reachable windows, and the dark side of the house come before the back of a closet.
- Finish the mechanical work: Locks, long screws, and track blocks go in before any magnet does.
- Restrict only where the map allows: A limiter on a non-escape sash is fine. The same limiter on a required rescue opening is not.
- Contacts on operable panels: Put them where seasonal swell, pets, and a door left slightly proud by heat won't chatter all night. Gap the magnet for the worst afternoon fit, not the cool morning fit.
- Glass-break on large fixed panes: A contact never sees a sidelight. A glass-break sensor does, if you test it with the manufacturer's method rather than a guess.
- Lights on the approach: Motion or occupancy heads aimed at the walk and the gate, not into a neighbor's bedroom.
Then walk the property after dark. Note a gate left open, a lamp head buried in a shrub, and any approach the porch light never reaches. If you're choosing among contact, glass-break, and monitored panels, burglar alarm advice from Networking2000 is a useful reference, because the sensor type has to match the opening you already hardened.
What quietly switches the system off
Deadbolts left retracted, sensor batteries past their date, blocked lamp heads, and a key on a hook beside glazed doors undo the package faster than any missing device. Keep a commissioning note with test dates and the month each battery is due. Repeat the night walk when the season changes, because a door that latched in January can sit proud in August and hold a contact open. Security that isn't tested is décor.
Decide What to Fix This Week
Most completed entries go through openings nobody latched. Defeated locks are the smaller share. That ordering matters when you spend this week's budget: if your audit found doors and sashes that close, latch, and can take 3-inch screws into framing, stay there. Hardware, sensors, and a nightly lock check move you further than a new keyway. If I had one hour, I'd spend it on the openings that failed the midday latch test.
Stop adding cylinders when the slab is swollen, the sill is rotten, the window is racked out of square, or the weather seals are gone so the lock never meets. A lock can't secure an opening that doesn't close. In Texas heat, test the latch at midday, not only at dawn. That's the split. Fasteners and habits on openings that already sit square; replacement or a rebuilt jamb when they don't.
If you're adding a connected lock
Treat a smart lock as convenience layered on a mechanical latch, not as the plan. Smart-lock security statistics compiled for 2026 report that 67% of surveyed smart-lock users didn't enable two-factor authentication, 41% reused an app password, and 23% shared an access code instead of creating unique ones.
- Use a unique temporary code for each sitter or contractor, then delete it.
- Remove former occupants and old trades the day they finish.
- Turn on multifactor authentication, and install updates.
- Keep a mechanical way out if the battery dies or the network drops.
Auto-release and a cloud account are new ways to leave a door unlatched. A dead battery on a Saturday night strands you the same way a lost key does, unless the keyed override still meets the escape map. Codes get deleted or they pile up, and every stale code is a key you can't see hanging on a hook.
When the audit lands on a fiberglass entry, a multipoint tilt-turn, or a full replacement because the frame won't hold hardware, Breaking Glass Co. measures and installs those openings across Texas and ships product nationwide. Everyone else can finish the weekend list without a truck: latch, long screws, track blocks, a night walk, and a note of which bedroom window must stay key-free.
If a door won't sit in the strike or a window won't stay square through a Texas summer, Breaking Glass Co. supplies and installs fiberglass entries, tilt-turn windows, and replacement packages built for that climate, with installation across Texas and shipping nationwide. Bring your escape map and the list of openings that failed the latch test. Request a same-day quote at Breaking Glass Co..