
You're standing in a basement that could be a guest room, office, or family room, but right now it feels like a storage area. The ceiling is finished, the floor is usable, and yet the small high windows cast little more than gray rectangles across the wall. The tempting solution is obvious: cut a larger opening, install daylight windows in basement walls, and let the space breathe.
That approach can work, but a basement window is never just a window. It's a structural opening, an emergency escape component when a sleeping room is involved, and a drainage point where rainwater, runoff, and snowmelt collect. The largest glass unit can still leave a room gloomy if a tall retaining wall blocks the sky, while an attractive window well can become a leak path if it lacks positive drainage.
Table of Contents
- Why Homeowners Consider Daylight Windows in Basement Spaces
- Types of Daylight Windows and Well Configurations
- Egress Code Requirements and Daylighting Standards
- The Daylighting Performance Gap Most Guides Ignore
- Waterproofing and Drainage Systems for Below-Grade Windows
- DIY Versus Professional Installation Decision Framework
- Cost Expectations and Project Planning Checklist
Why Homeowners Consider Daylight Windows in Basement Spaces
A homeowner usually starts this project for one of three reasons. The first is livability. A dark basement can hold furniture and finished walls without feeling like part of the home. Natural light changes that perception quickly, especially when the window placement supports a desk, seating area, or bedroom instead of merely illuminating an unfinished utility corner.
The second reason is safety. If a basement sleeping room is planned, the window may need to serve as an emergency escape opening, not just provide daylight. That requirement changes the window size, sill position, well dimensions, and sometimes the need for a permanent ladder or step system.
The third is ventilation. An operable window can provide seasonal airflow, but ventilation only helps when the basement's humidity and water-control systems are already sound. Opening a wall won't correct seepage, poor grading, or persistent condensation.
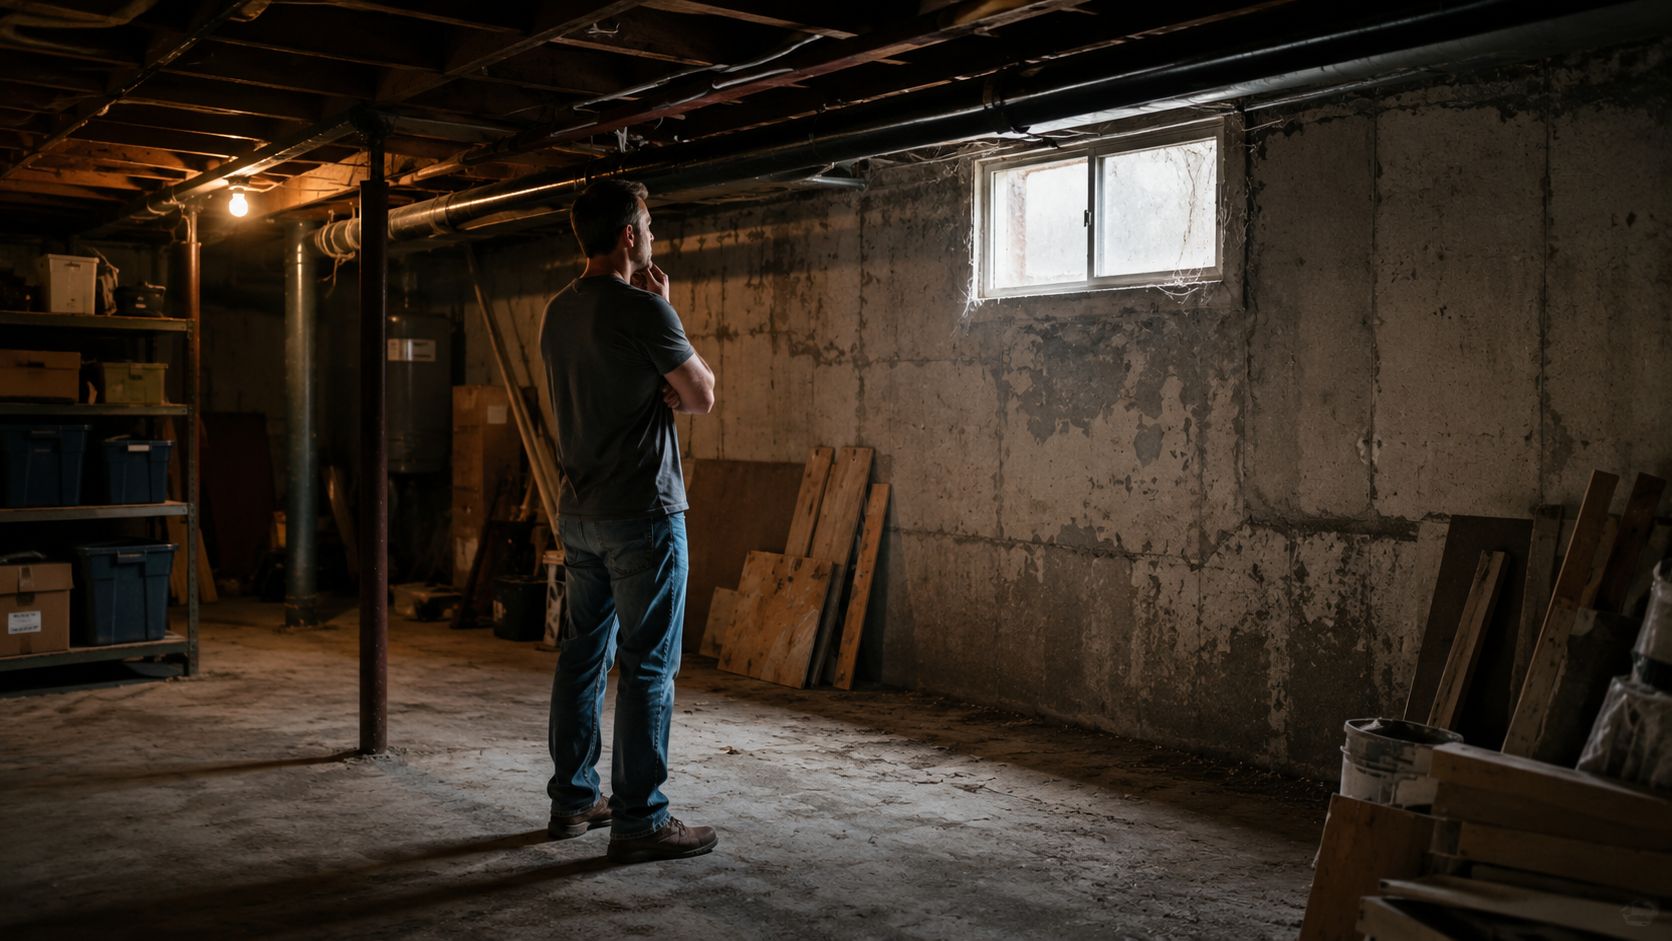
The payoff is real, but so is the disruption
A new basement opening may require foundation cutting, temporary support, excavation, a lintel or header, waterproofing, drainage, exterior restoration, and interior finishing. Those tasks are connected. A contractor who prices only the window and a metal well is leaving out the parts most likely to determine whether the project performs well.
Practical rule: Treat the window, foundation opening, well, and drain as one assembly. Choosing the glass before reviewing the soil and water conditions is backward.
The historical path of basement egress rules shows why these openings became more than a design feature. A widely cited review records an early direct emergency-exit requirement around the 1960s, with a 1964 Uniform Building Code version specifying an openable window, a maximum sill height of 48 inches, and a minimum opening of 5.0 square feet. By 1976, the familiar baseline had tightened to a 44-inch maximum sill height and 5.7 square feet of net clear opening. The historical review of emergency egress windows explains that progression.
For a homeowner, the practical decision is simple even if the construction is not. If the basement is only storage, a modest daylight window may be enough. If it will contain a bedroom, start with the egress design and build the daylighting plan around it.
Types of Daylight Windows and Well Configurations
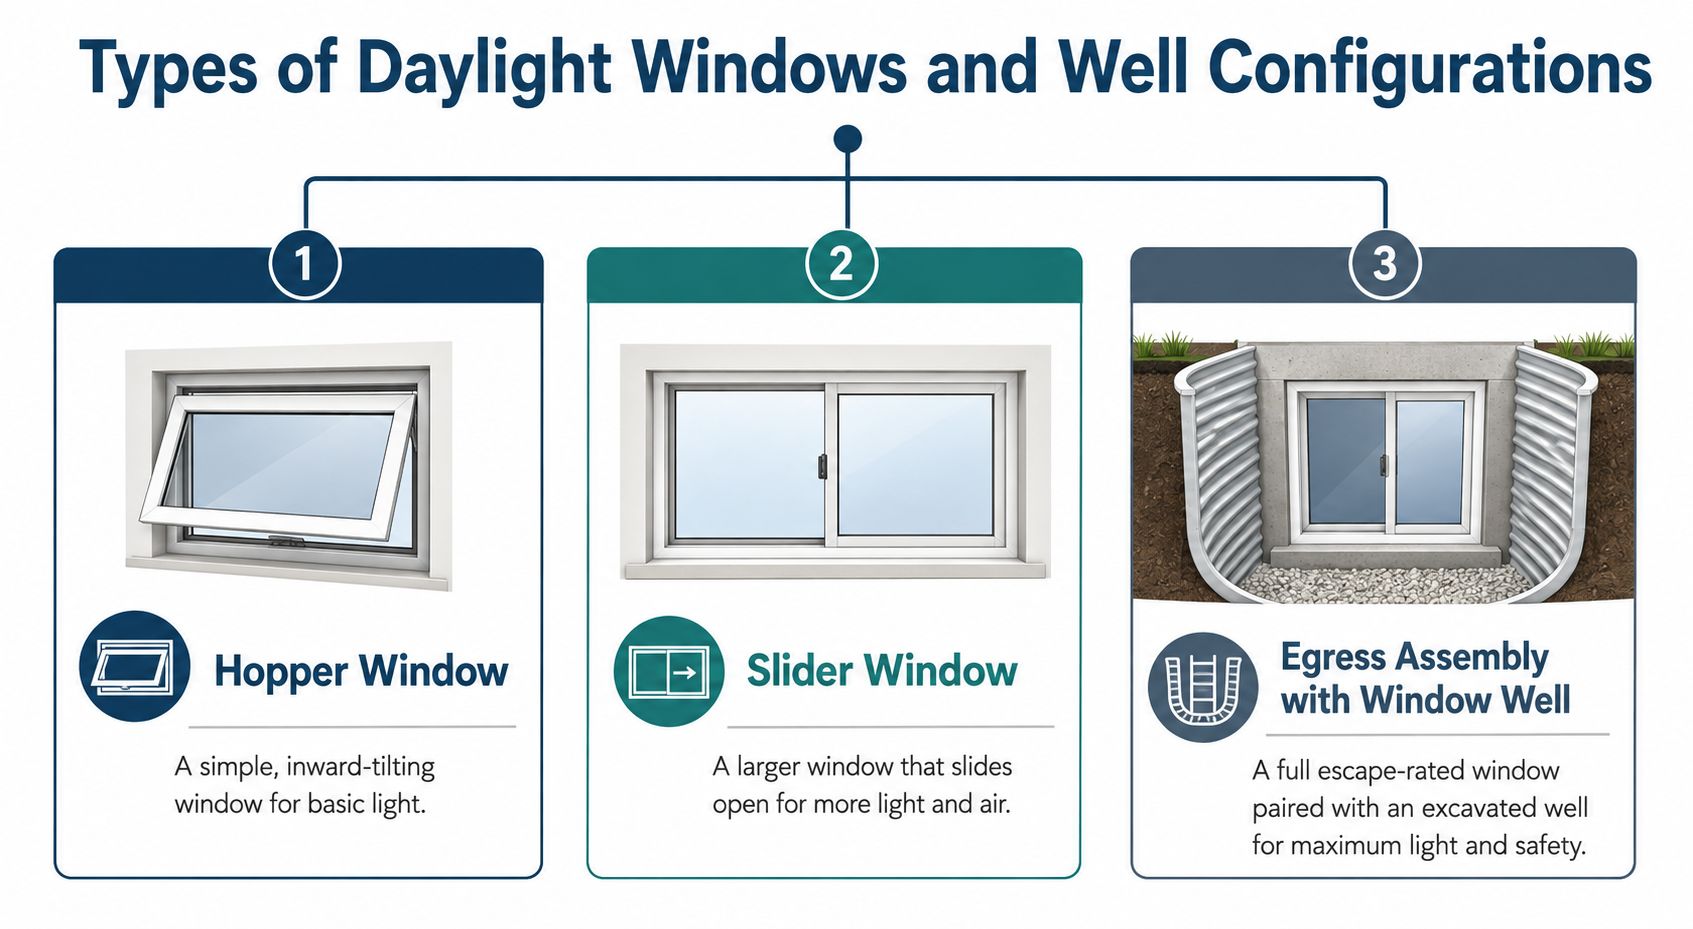
The easiest way to understand basement window options is to separate the window operation from the exterior well. The window controls light, airflow, and escape access. The well creates the open space outside the glass, manages soil, and determines how much sky the window can see.
A hopper window is the compact option. Its sash tilts inward from the top, much like a small hatch. Hoppers work well where wall height is limited, but the inward swing must clear trim, furniture, and any required escape path. They're often suitable for basic daylight and ventilation, but a small hopper may not provide the usable opening required for a sleeping room.
A slider moves horizontally. It can provide a wider opening without swinging into the basement, which helps with furniture layout. The tradeoff is that only part of the overall frame may open, so the rough size can be misleading when you're checking net clear opening.
Casement windows crank outward, making much of the frame available for ventilation and escape. Awning windows hinge at the top and open outward from the bottom. Both need clearance inside or outside, and a below-grade well must accommodate the operating sash without creating an obstruction.
Wells do more than hold back soil
A corrugated steel well is common because it installs quickly and has a familiar profile. A modular plastic or composite well can resist corrosion and may offer a brighter interior surface. Custom masonry or concrete retaining walls can integrate better with a finished area, but they demand more careful structural and drainage detailing.
The well's shape affects light as much as the glass does. A deep, narrow well with a high retaining wall can turn a large window into a view of concrete and soil. A wider configuration with light-colored surfaces can expose more sky and reflect more daylight into the room.
Use a window rough opening size guide before ordering. The rough opening is the framed space, not the same thing as the net clear opening used for egress.
Covers, ladders, and retaining walls
A cover can keep leaves and debris out, but a poorly fitted cover can restrict escape or reduce light. Choose a cover that can be opened from inside without special knowledge or excessive force, and verify that it won't interfere with the window sash.
If the well is deep enough to obstruct escape, a permanently installed ladder or step system may be required. Retaining walls should be designed to resist soil pressure and shed water, not just support decorative stone. The right assembly gives you light, access, drainage, and stable soil support at the same time.
Egress Code Requirements and Daylighting Standards
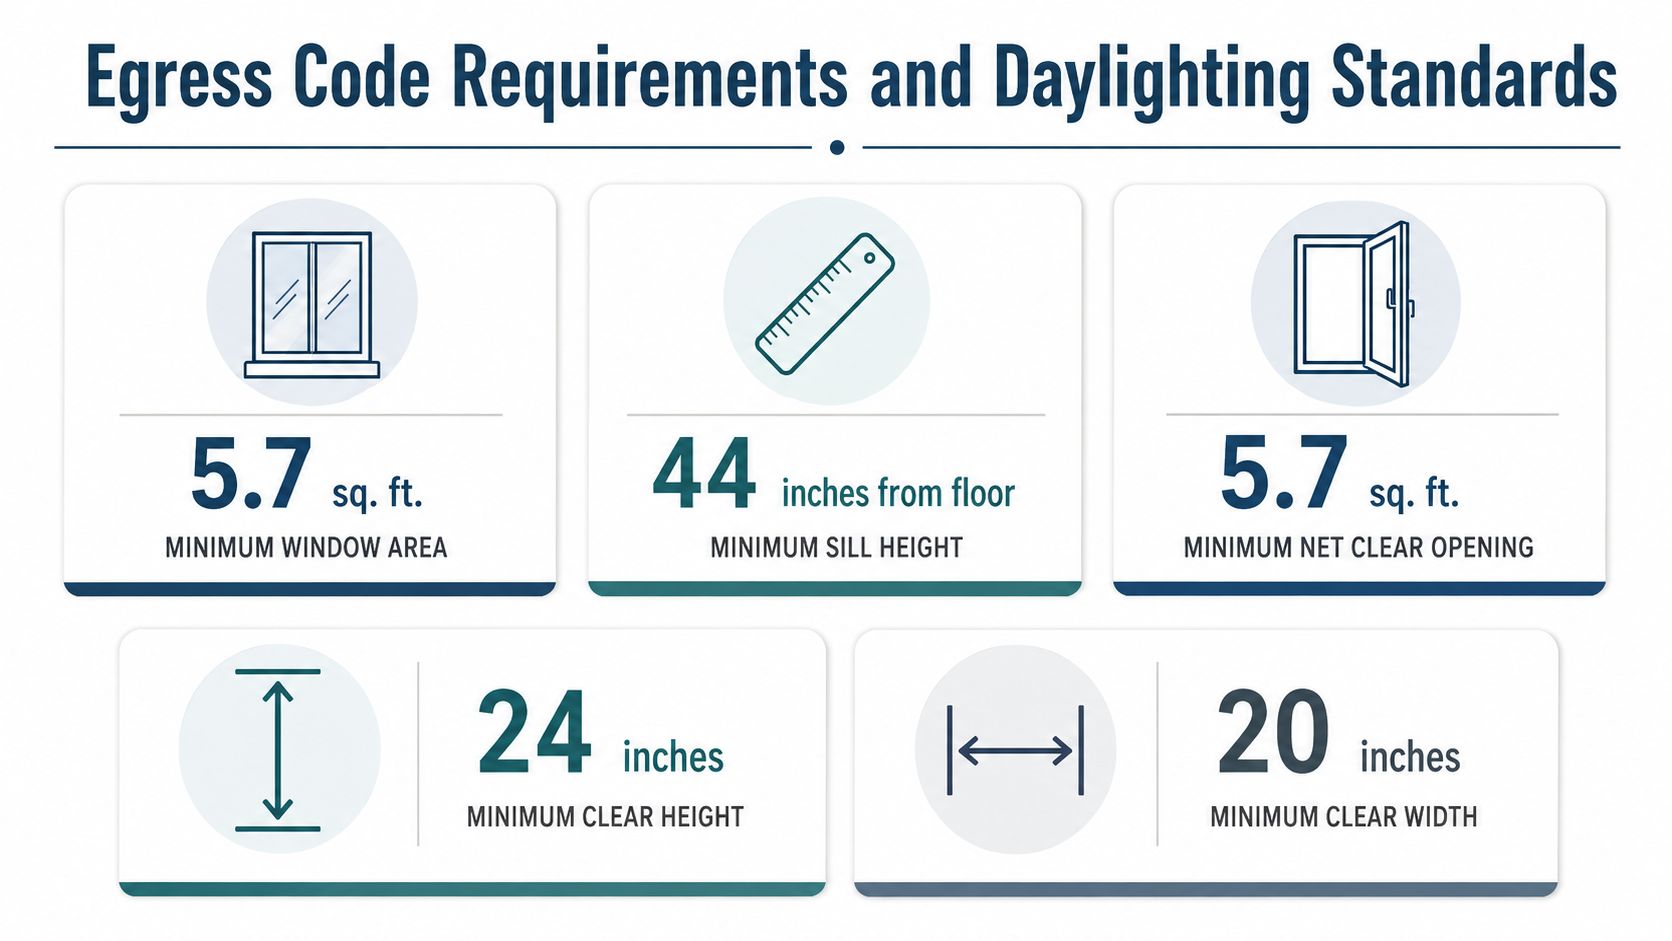
The most important code phrase is net clear opening. It describes the unobstructed passage available when the window is open. The frame, sash, insect screen, grille, and operating hardware can reduce that passage, so a window marketed as “large” may still fail the actual measurement.
Common code summaries for sleeping rooms below grade specify:
- Net clear opening: At least 5.7 square feet, as summarized in Washoe County's window egress guidance.
- Clear opening height: At least 24 inches, using the same guidance.
- Clear opening width: At least 20 inches, also from that code summary.
- Sill height: No more than 44 inches above the finished floor, not merely above the concrete slab.
- Window well area: Typically at least 9 square feet of horizontal area, with 36 inches of width or projection where the opening is below grade, as described in basement egress window code guidance.
Those dimensions are not interchangeable. A narrow window may meet the height requirement but fail the width requirement. A tall window may provide adequate glass area while placing the bottom of the clear opening too high for practical escape. The well must also leave enough room for a person to move away from the opening.
Legal escape and useful daylight are different tests
A compliant escape window can still produce disappointing light. The code measurements focus on access and evacuation. They don't guarantee that the window sees enough sky, that the well reflects light, or that the glazing delivers strong visible transmission.
For habitable basement spaces, U.K. guidance associated with BS EN 17037 uses daylight performance criteria, including roughly 300 lux over part of the space for at least half of daylight hours, as described in the available basement daylighting data. That standard illustrates a different question: not “Can someone exit?” but “Does the room receive useful illumination?”
Watch the installation details before approving a proposal.
A useful cost and planning reference is Aureli Construction's guide to basement egress window costs. For Texas projects, also review the contractor's experience with Texas window replacement, especially if an existing opening must be enlarged or reframed.
The Daylighting Performance Gap Most Guides Ignore
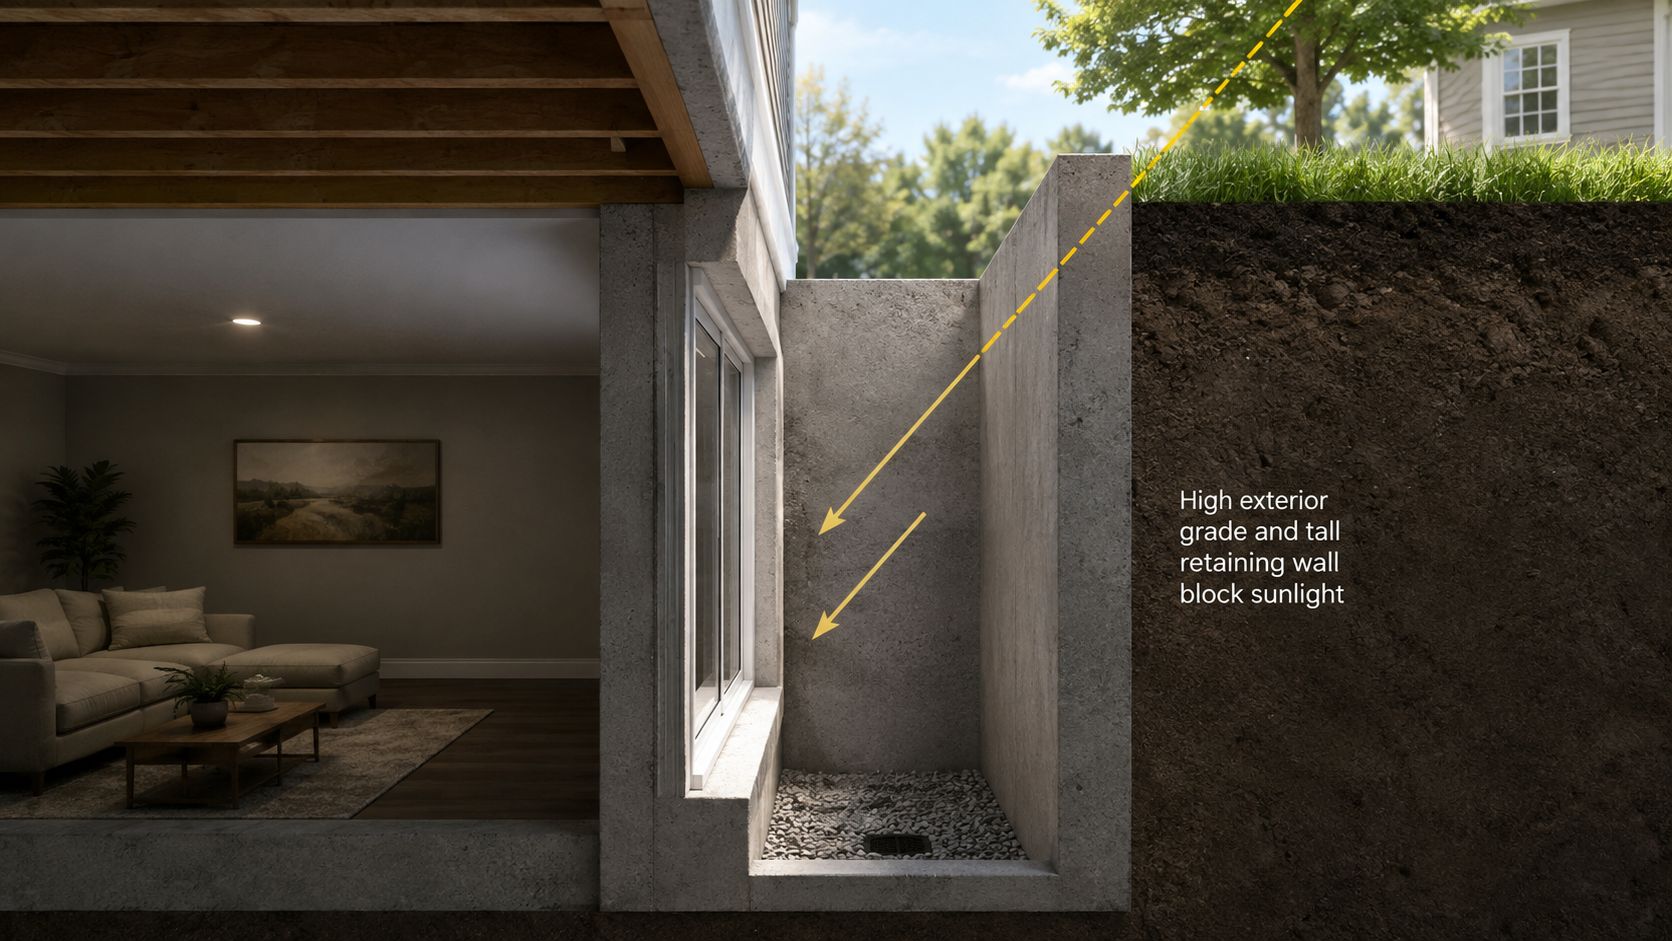
A larger egress opening doesn't automatically create a brighter basement. The well can cancel out the advantage if its retaining wall rises high around the glass, the surrounding grade slopes toward the opening, or nearby structures block the visible sky.
Think of the window as a camera pointed upward. The glass may be wide, but the image is still dark if the well blocks the lens. A shallow, open well can admit more sky than a deeper well with the same window area. Light-colored well surfaces may also reflect more light than dark, weathered materials, although reflection can't compensate for a badly obstructed geometry.
Specify glass for light, not only heat control
Glazing has its own tradeoffs. Visible light transmittance describes how much daylight passes through the glass, while low-E coatings influence heat transfer and solar control. A coating selected primarily for aggressive heat rejection may deliver a different visual result from glazing chosen to preserve daylight.
That doesn't mean low-E glass is wrong for Texas. It means the window should be specified for the room's orientation, shading, and comfort goals instead of selected from a generic replacement package. Ask for the visible-light characteristics of the proposed glass and compare them with the amount of sky the well exposes.
Orientation matters too. A south-facing well in Texas can receive strong direct sun, glare, and heat, particularly when the well has reflective surfaces. A north-facing opening generally offers more even illumination, but it may feel less intense. East and west exposures bring their own glare and heat patterns during morning and afternoon hours.
Review the entire light path
Before choosing a larger unit, stand at the proposed opening and inspect the sky view. Mark the top of the future retaining wall, account for the finished grade, and consider fences, patios, shrubs, and neighboring structures.
A good proposal should show more than the window's dimensions. It should identify the well geometry, glazing selection, interior finish, and expected shading conditions. If the contractor only says “bigger glass means more light,” ask what happens when the well is finished.
Waterproofing and Drainage Systems for Below-Grade Windows
A window well is a drainage system with glass in the middle. It intercepts roof runoff, garden irrigation, stormwater, and in some regions snowmelt. The wall intersection becomes vulnerable when water accumulates faster than the soil or drain can remove it.
The most reliable assembly gives water a defined route away from the opening. That usually means a well drain connected to daylight, a sump system, or the existing drain-tile network, along with a free-draining gravel base. The wall around the new opening also needs compatible waterproofing, and the finished grade should direct surface water away from the foundation.
Build the water path before the window
Start outside and work inward:
- Shape the grade: Keep surface runoff moving away from the well rather than toward it.
- Prepare the base: Use free-draining material so water doesn't sit beneath the sill.
- Install the drain: Connect the well drain to an approved discharge or collection system.
- Seal the foundation: Tie the window flashing and waterproofing membrane into the existing wall treatment.
- Protect the opening: Fit a cover that sheds debris without restricting emergency escape.
Standing water creates hydrostatic pressure against the wall and window assembly. Over time, leakage can damage the sill, framing, insulation, and interior finishes. Moisture also raises the risk of rot and mold when the area stays damp.
Drainage principle: Water should leave the well faster than it enters. Gravel alone isn't a drainage system if there's nowhere for the water to go.
Texas soil makes shortcuts expensive
Many Texas sites include expansive clay, which can move as its moisture content changes. Heavy rain can also overwhelm a shallow or poorly connected drain. A well that performs during a dry inspection may still fail when saturated soil presses against the foundation and runoff fills the excavation.
Coordinate the window opening with the foundation waterproofing plan. Guidance on high-performance homes emphasizes drainage away from foundations, waterproofing, and suitable ground cover, while French drain installation tips can help homeowners understand how trench drainage should be planned rather than improvised.
Condensation deserves attention as well. An operable window won't solve humid basement air, and ventilation without humidity control can introduce more moisture during hot, damp weather. Keep the interior temperature, air circulation, and dehumidification plan aligned with the new opening.
DIY Versus Professional Installation Decision Framework
Replacing a window inside an existing, sound well is a different project from cutting a new opening through a poured concrete foundation. Treating both as DIY tasks is how homeowners end up with structural movement, leaks, or an opening that fails inspection.
| Project condition | Reasonable DIY role | Professional requirement |
|---|---|---|
| Existing window and existing well | Measure, remove, and replace if the frame and drainage are sound | Review unusual damage or failed waterproofing |
| New opening in block foundation | Limited preparation by an experienced homeowner | Structural layout, cutting, support, flashing, and inspection |
| New opening in poured concrete | Site preparation and interior finish work only | Engineering judgment, concrete cutting, temporary support, and waterproofing |
| Clay soil or difficult excavation | Surface preparation and cleanup | Excavation, retaining, drainage, and soil management |
| Suspected high water table | Avoid self-designed drainage | Waterproofing and discharge design by qualified trades |
| Basement bedroom | Finish planning and decoration | Code review, egress sizing, well access, permits, and inspection |
The foundation is the dividing line. Cutting concrete or removing masonry changes how loads travel through the wall. A contractor must account for the opening, the remaining wall, and the support above it. The drainage side is equally important, especially where soil stays wet or the excavation reaches below the surrounding water level.
Permit and inspection rules vary by jurisdiction, so check with the local building department before ordering a window. A product can be physically large enough and still fail because the installed clear opening, sill height, well access, or structural detail is wrong.
Experienced DIYers can often handle interior trim, painting, debris removal, and replacement work that doesn't alter the foundation. New openings, below-grade drainage, structural modifications, and bedroom egress should be assigned to qualified professionals. Use window installation services as a reference point when comparing the scope of installation support available.
Cost Expectations and Project Planning Checklist
Basement daylight window costs vary by the parts hidden behind the finished trim. The window unit is only one line item. Excavation, well materials, drainage, foundation cutting, structural reinforcement, permits, waterproofing, labor, and interior repairs can all affect the final proposal.
Foundation type matters. So do soil conditions, well depth, access for excavation equipment, drainage connections, glazing selection, and the quality of exterior and interior finishes. Ask every contractor to separate those components instead of giving you one unexplained allowance.
Use this checklist before signing:
- Confirm the room use: Decide whether the space is storage, a habitable room, or a sleeping room.
- Measure the finished condition: Check sill height and clear opening after flooring and trim are accounted for.
- Inspect the site: Review grade, soil, foundation type, runoff, and existing drainage.
- Request a daylighting plan: Ask how well height, orientation, retaining walls, and glazing affect light.
- Verify permits: Get the local requirements in writing before work begins.
- Compare complete bids: Require excavation, waterproofing, drainage, structural work, window installation, and finish restoration.
- Plan maintenance: Include access for cleaning the well, testing the drain, and inspecting seals.
If the existing unit is failing rather than the opening itself, a guide on when to replace home windows can help separate a normal replacement from a full basement modification.
Breaking Glass Co. supplies and installs residential and commercial windows, including new-construction and replacement units suited to Texas and Southwest conditions. Visit Breaking Glass Co. to request a quote and discuss the window, opening, and installation requirements before your basement excavation begins.