
The delivery truck has left, the new French doors are leaning against the garage wall, and the old patio unit is already out. Then you hold the frame up to the opening and find it rocks on one corner. The width fits at the middle and binds at the top. That is the moment most exterior French door installation jobs turn expensive in Texas, not when the first screw goes in.
A pair has to work as one unit. Two hinged leaves, a meeting stile, an astragal, and a shared sill must stay parallel through wind-driven rain, summer heat, and slab movement. Measure for that whole system, choose the threshold before you order, and refuse to sign off until water has tested your work.
Table of Contents
- Measurements, Order Details and Tools to Gather First
- Choosing the Threshold Before You Order
- How to Prep the Rough Opening
- How to Flash the Sill, Jambs and Head
- How to Set, Shim and Fasten the Door Pair
- How to Install and Adjust the Hardware
- Sign Off the Install Only After a Rain Test
Measurements, Order Details and Tools to Gather First
Treat the opening as one assembly, not two door slabs. If the meeting stile, astragal, and latch points don't share the same plane, one leaf will close clean and the other will drag, leak air, or leave daylight at the center.
That paired, broad-glazed form is what defines a French door, a design rooted in Renaissance architecture and later adapted for exterior patio use. Today's versions add insulated glazing, weatherstripping, and engineered thresholds, but the alignment problem hasn't changed.
Measure Before Anyone Builds the Unit
Record every reading below and send it with the order. Don't order from memory or from the size printed on the old door.
| Measurement | How to take it | Common mistake | Order or check note |
|---|---|---|---|
| Rough opening width | Measure top, middle and bottom and use the narrowest | Measuring once at mid-height | Order to the manufacturer's clearance, often about 1/2 to 1 inch wider than the unit; confirm on spec sheet |
| Rough opening height | Measure left, center and right at sill and head | Using one reading only | Check the high point of the sill against the head |
| Diagonals | Measure corner to corner and compare the two readings | Skipping the check on new framing | Difference must fall within the manufacturer's tolerance; ask the manufacturer if it is not published |
| Sill height above finished floor | Measure from slab or subfloor to the planned finished floor | Forgetting floor finish thickness | Determines which threshold option you can use |
| Wall thickness at jamb | Measure from interior face to exterior sheathing | Jamb too short for thick wall | Ask for a jamb extension if the wall exceeds the standard jamb depth |
| Active leaf and swing | Stand outside and note which leaf opens in and which opens out | Ordering the wrong handing | Confirm handing with the factory before production |
Check your width and height readings against a guide to standard double door size before you finalize the order. A standard size that almost fits can still leave you shimming a gap the frame wasn't built for.
Go or no-go rule: If the diagonals differ by more than the manufacturer's tolerance, correct the opening before the doors ship. Shims won't make a racked opening square.
What to Send and What to Stage
Send the manufacturer the unit size, handing, glass package, threshold style, and whether you need a sill pan or pre-sloped sill. Get confirmation in writing. A handing error caught on paper costs nothing. The same error caught on site costs a reorder.
Stage a 4-foot level, speed square, tape, laser or plumb bob, cordless drill with long bits, cedar or composite shims, and a pry bar. Add flashing tape, sealant and foam guns, and a helper. French door leaves are wide, glazed, and awkward to carry alone, and a leaf twisted during handling can crack a corner joint before it's ever hung.
Choosing the Threshold Before You Order
The finished floor and landing decide how much threshold height the opening can accommodate. Measure from the planned finished floor to the sill bearing surface, then compare that measurement with the door options and the landing height. A low threshold eases passage for walkers and wheelchairs, but leaves less height to resist wind-driven rain. A raised sill can help manage water, while creating a step that may limit access.
Code allowances depend on the door location and site conditions. Confirm the permitted threshold step and landing requirements with the local code official before ordering. Do not treat an allowable maximum as a recommended threshold height. If an accessible route is required, confirm that the selected sill and landing meet those requirements too.
Compare the Trade-Offs Honestly
| Threshold approach | Main trade-off | Check before ordering |
|---|---|---|
| Flush threshold | Easier access, with less sill height to help keep water out | Confirm the landing drains away from the house and the sill system suits the exposure |
| Low raised sill | Adds some height at the sill, but creates a small step | Check the finished-floor-to-sill measurement and whether the step works for the intended users |
| Higher raised threshold | Allows a larger step at the door, which can complicate access | Get local approval for the step and landing, and confirm the door manufacturer's requirements |
A flush sill is not automatically the best choice. On an exposed wall, a slightly raised sill paired with a landing that drains away may be a more practical water-management choice. The landing, door swing, finished-floor height, and direction of storm exposure all affect that decision.
Walk the route with the homeowner before the order is final. Check the actual landing and finished floor, not just the framing dimensions. If the landing is too high or slopes toward the door, choosing a different threshold alone will not correct the underlying problem.
Get approval for any threshold step that depends on a code allowance. Confirm the decision with the local code official and the door manufacturer, then record the approved option before ordering. This matters when accessibility and water control point toward different sill heights.
Seal the Perimeter After Fastening
Follow the flashing section for perimeter sealing and drainage details.
How to Prep the Rough Opening
Flashing can't fix a racked or sagging opening. If the framing is wrong, you'll spend the rest of the job forcing a square door into an unsquare hole, and the leaves will tell on you every time they close.
Check the frame in the opening with a tape and level before you commit to any fastener.

Numbered Prep Sequence
- Confirm the header and framing are sound: Look for rot, insect damage, and sag. Sister or replace anything that fails, because the header carries load over a wide pair.
- Strip the old unit completely: Remove the old door, sill caulk, and failed sill pan down to sheathing. Photograph the bare opening for your record.
- Recheck square, plumb, and level: Compare diagonals again. Fix out-of-tolerance points with framing, not shims alone.
- Verify support under the sill: Both jamb ends and the full sill need solid bearing. Add blocking or a jack stud where subfloor or slab has settled.
- Repair sheathing and housewrap: Patch tears so flashing has clean wrap to lap over. A torn drainage plane behind the jamb is a leak waiting for wind.
- Let the opening dry: Don't close in framing that's wet from rain. Trapped moisture shows up as staining within a season.
- Dry-fit the pair: Set it without fasteners and check clearance, reveal, and swing.
Review how the door entrance frame relates to the rough framing if you're rebuilding a damaged jamb area. The frame and the opening have to share load cleanly, or the reveal shifts under use.
Watch the dry-fit and leveling checks in sequence before you move to flashing.
Texas Conditions to Check
Summer heat can cup or check exposed framing left open for days, so don't tear out the old unit until the new one is on site and verified. In clay soil areas, look for slab cracks near the opening and a sill line that has dropped more on one side than the other. Note both in your photos.
A dry-fit that binds means the opening needs work, not the door. Stop and fix the framing while it's still exposed.
How to Flash the Sill, Jambs and Head
Flashing carries the water. Sealant only backs it up. If you reverse those jobs, the install depends on a caulk joint that will shrink, split, and let storm rain into the wall cavity.
Use a sequenced system, not perimeter caulk alone. Federal Building America guidance states that openings are vulnerable moisture paths and the sill should remain able to drain outward while jambs and head are sealed and lapped to shed water away from the wall cavity.
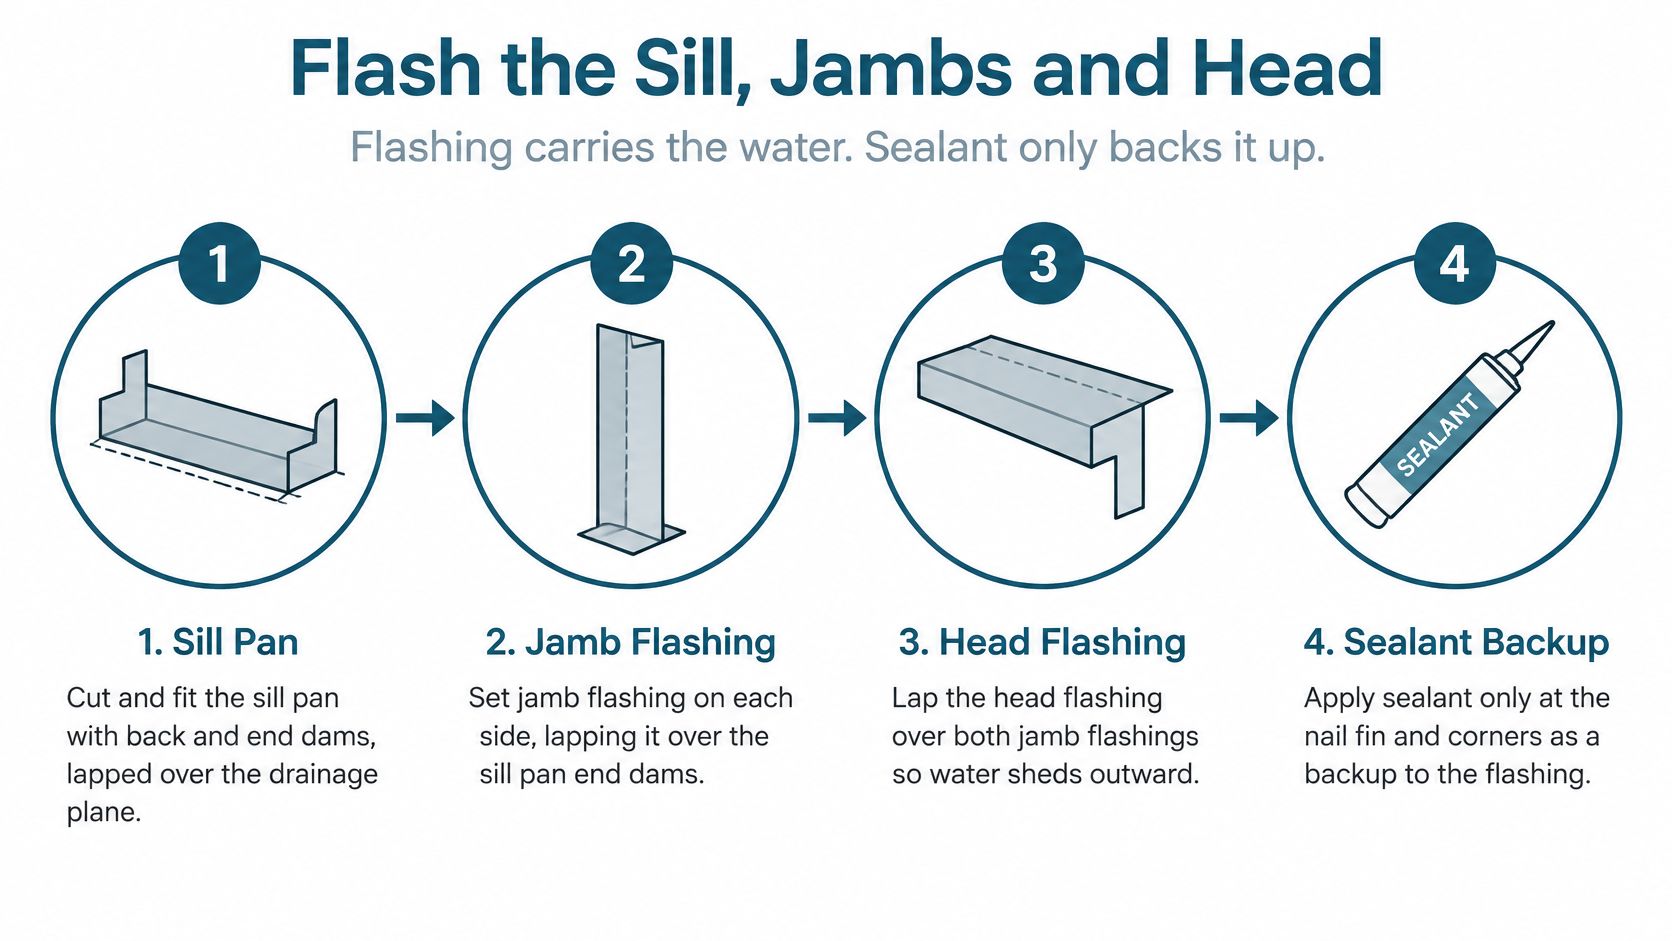
Install in Shingle Order
- Fit the sill pan first: Cut and fit a continuous pan with a back dam and end dams, lapped over the drainage plane below. Keep it free of wrinkles and punctures.
- Slope it outward: Set the sill so water that reaches the pan has a clear path to exit outside. A pan that dips in the middle holds water under the door.
- Apply jamb flashing: Run it on each side so it overlaps the sill pan at the bottom and integrates with housewrap at the top.
- Apply head flashing: Lap it over both jamb flashings so the head layer sheds water onto the jamb layers, not behind them.
- Check every lap: Upper layers go over lower ones. Never reverse that order.
- Protect the drain path: Confirm sealant, foam, shims, and fasteners don't block the exterior drainage path at the sill.
- Photograph everything: Capture each layer before trim or interior finish covers it.
Slips That Cause Callbacks
Head flashing tucked under the housewrap channels water behind the jamb instead of over it. Sealant smeared across the pan can dam the very water the pan is meant to drain. Tape laid without rolling leaves air pockets that peel in heat, and a fastener punched through the pan's low point creates a direct path into the sill framing.
Roll every piece of flashing tape firm and flat. Work from the center outward so you don't trap a bubble at a corner. At corners, fold, don't stretch. Stretched membrane pulls back when the wall gets hot.
Texas storm rain doesn't fall straight down. Wind pushes it sideways and up under weak head laps, especially on walls with little overhang. That's why the head lap matters more here than most installers expect. If the head flashing is reversed, a hard storm finds it before a gentle rain ever will.
On the interior side, air-seal the perimeter with compatible sealant or low-expansion foam after the door is set. Keep that seal continuous at jambs and head, but don't fill the sill's designed exterior drain. Air sealing and water drainage are separate jobs at the bottom of the unit, and confusing them traps water inside the assembly.
How to Set, Shim and Fasten the Door Pair
Set the frame to the opening. Don't force it into place. A frame twisted to match bad framing keeps that twist, and both leaves bind or gap for as long as the door is in service.
Work with your helper on opposite sides of the unit. One person holds plumb while the other shims and fastens, and you both watch the reveal instead of trusting one level reading.
Setting Sequence
- Set the sill on the pan: Check it level side to side and confirm it still drains outward. Don't bed it in a way that seals the pan shut.
- Shim in pairs: Place paired shims at each hinge location and under load points. Leave them proud until you've checked the frame.
- Set the frame plumb: Check the reveal around both leaves at the head and jambs. The gap should read even before you fasten.
- Fasten to the manufacturer's schedule: Drive through the nailing flange or jamb holes as specified, starting at the hinge side and working outward. Don't overdrive screws, since that pulls the jamb out of square.
- Recheck after the first fasteners: Verify plumb, level, and diagonals. If the frame twisted, back the fasteners out and reshim instead of driving more screws to pull it straight.
- Seat both leaves: Set the inactive leaf, then the active leaf, as the manufacturer specifies. Check the meeting stile before final fastening.
- Trim shims last: Cut them flush only after the frame is fastened and both leaves open and close freely.
Three Shim Rules
- Use stable shims: Pick material that won't compress under load or rot if it gets damp.
- Keep shims out of drainage: Never block the sill pan's path to the exterior.
- Don't hide bad framing: Shims adjust a sound opening. They don't correct a racked one.
Field check: Close each leaf slowly with one finger. If you have to lift, push, or shoulder it into the latch, the frame isn't set yet, no matter what the level says.
Wood jambs move with summer heat, so set the frame on a day close to expected operating temperature when you can. A reveal that's perfect on a cool morning can tighten by afternoon on a south-facing wall. Leave the manufacturer's clearance, not the tightest gap you can achieve.
How to Install and Adjust the Hardware
Hardware goes in last because it can't fix an opening problem. If you find yourself adjusting hinges and strikes over and over to make the pair latch, stop. You're likely masking a frame that's out of square.
Fit and adjust each hinge with the leaf supported, so its weight doesn't pull the screws off line.
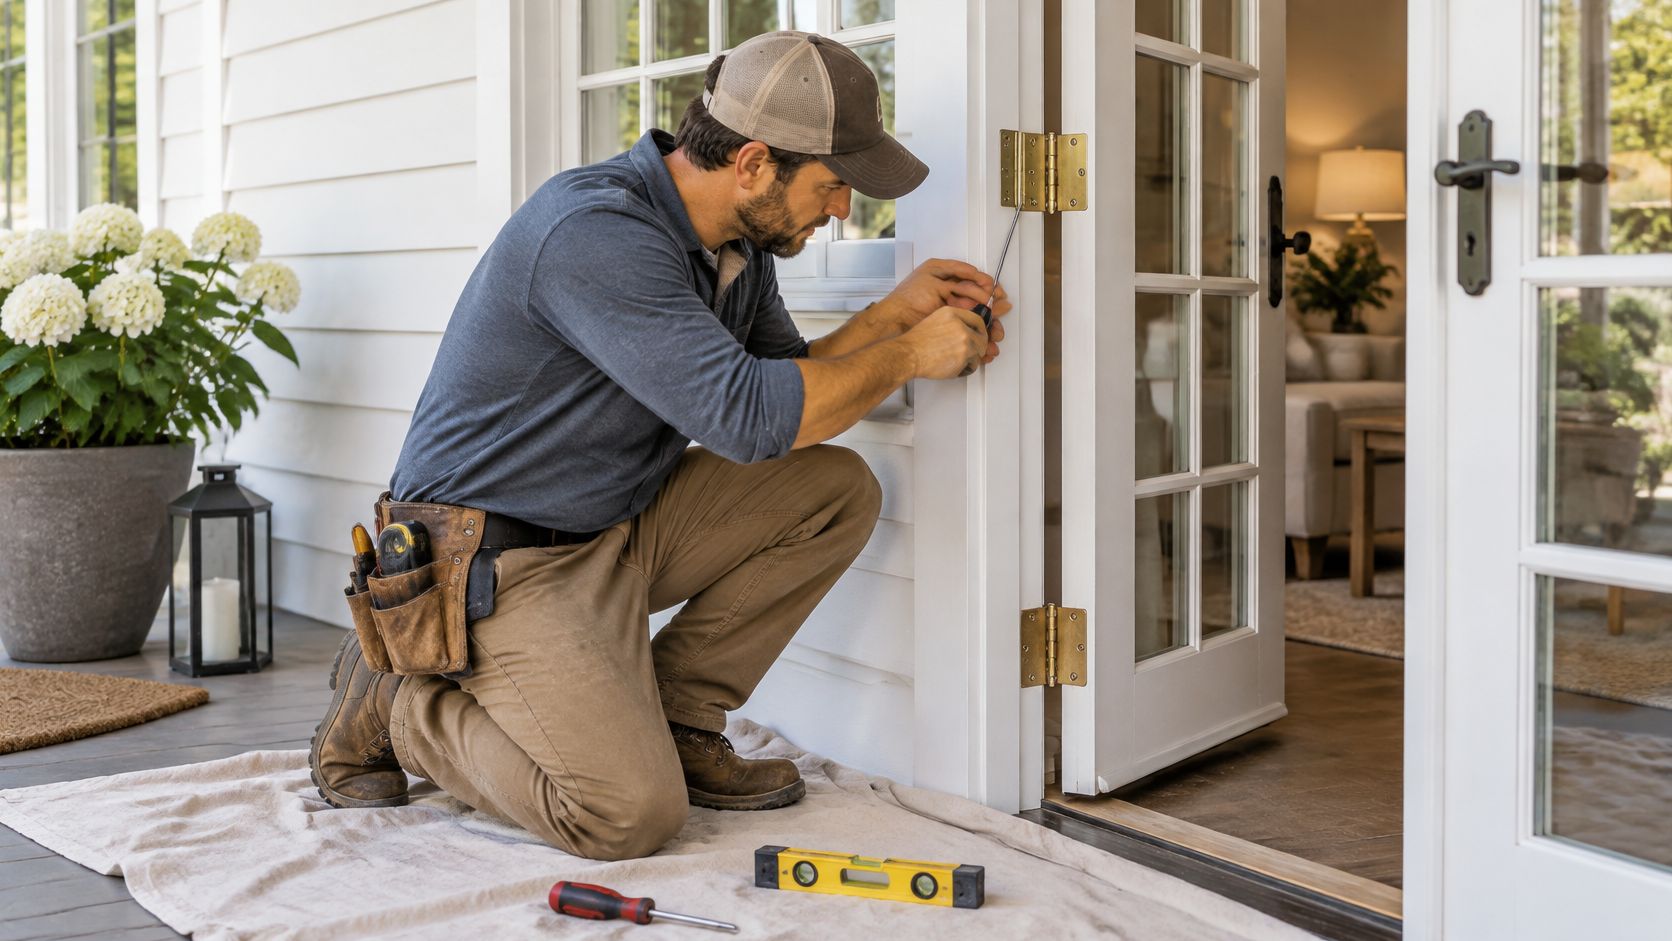
Hardware Sequence
- Install the lockset and handles: Work on the active leaf, follow the template, and align the latch with the strike before you tighten everything down.
- Fit the multipoint lock rods: Check that they retract and extend freely, with top and bottom bolts reaching the head and sill. A multi-point locking system for French doors only seals the meeting stile if every point engages without forcing the handle.
- Install flush bolts: Fit them top and bottom on the inactive leaf, with keepers set into the head and threshold.
- Set the strike plate: The active leaf should latch without lifting or dragging. Move the strike in small steps and retest each time.
- Mount the astragal: Fit the meeting-stile seal on the active leaf and check compression along the full height, not just at handle level.
- Add the sweep or threshold seal: Adjust for light, even contact. Too much pressure drags the leaf and wears the seal. Too little leaves a gap at the sill.
- Test each leaf alone: Open, close, latch, bolt, then reverse the order. Test the inactive leaf by itself too, since that's where misalignment hides.
Heat and Sun Choices
Pick corrosion-resistant finishes for exterior hardware. On south and west-facing doors, choose lock and handle finishes rated for ultraviolet exposure so they don't chalk or peel early. Use lubricant that stays stable in heat instead of gumming up inside the lock rods. Cycle the multipoint lock several times after lubricating and wipe off excess, because grit sticks to wet lubricant and makes the mechanism feel worn within months.
Sign Off the Install Only After a Rain Test
Doors that close smoothly on a dry afternoon prove almost nothing. Water, heat, and building movement are the true test, and none of them show up during a careful day-one demonstration.

Run the Test in Order
- Wait for forecast rain or run a hose test: Start at the bottom of the sill and work up, spending about 15 minutes per section. Don't blast the head first, or you won't know where water entered.
- Check inside: Inspect the sill and the bottoms of both jambs after each pass.
- Measure the meeting stile: Record the gap at top, middle, and bottom and compare it with your dry-fit reveal.
- Compare diagonals and support: Match current readings against the photos and measurements from rough-opening prep.
Recurring failures include one panel dragging, an inactive leaf failing to latch, uneven weatherstrip compression, daylight at the meeting stile, and leaks at the sill. A door adjusted correctly on day one can still bind later if the opening settles, the header deflects, or the sill loses support.
| Symptom | Likely cause | Fix |
|---|---|---|
| One panel drags at the top | Racked frame or sagging header | Check diagonals and header first; reshim before touching hinges |
| Inactive leaf will not latch | Flush bolt keepers out of line or sill has settled | Adjust keepers; if still off, check sill support |
| Uneven weatherstrip compression | Leaf not parallel to frame | Reset hinge-side shims and recheck the reveal |
| Daylight at the meeting stile | Astragal or strike misaligned, or pair racked | Adjust strike and astragal after confirming frame is square |
| Water at the sill after rain | Pan not lapped to drainage plane, or sealant blocking the drain | Reflash the sill and remove any blocking sealant so the sill drains |
Schedule a second check after the first heavy rain and the first hot spell. Expansive soils and slab movement can shift a sill over a few seasons, and repeated hinge adjustment can hide that movement while the opening keeps drifting. If the cause sits in the framing or flashing, go back to those steps before you adjust hardware again.
If your opening is racked, your slab has shifted, or you want the threshold, flashing, and rain test handled as one job, contact Breaking Glass Co. for measurement, ordering, and exterior French door installation across Texas. Tell us which wall the doors face and how your floor and deck heights line up, and we'll quote a unit and install plan built around those conditions.