
You're standing on the porch with a tape measure, looking at an old entry door that has dragged, leaked, or stopped latching. The replacement may be labeled 36 by 80 inches, but that label alone won't tell you whether you need a new slab, a prehung unit, or a complete frame replacement.
The first decision comes before the first measurement. A slab-only order uses the existing door as its reference. A replacement unit installed in the existing frame uses jamb measurements. A full prehung replacement uses the rough opening in the wall. Choose the wrong measurement mode and even an accurately measured number can produce the wrong door.
Table of Contents
- When the New Door Won't Fit and Why
- Choosing Your Measurement Mode Before You Start
- Measuring the Rough Opening Step by Step
- Jamb Depth, Sill Height, and Square Checks
- Swing Direction and Handing for Your Door
- Why a Quarter Inch Can Sink the Whole Job
- Final Measurement Checklist Before You Order
When the New Door Won't Fit and Why
A homeowner once stood on a porch step with a tape measure in one hand and a new prehung door leaning against the wall. The box said 36 by 80 inches. The opening looked close enough. Then the tape showed the framed opening was only about 34 inches wide at its tightest point.
The problem wasn't necessarily the product. It was the assumption that the existing slab, the frame, and the wall opening all represented the same dimension. They don't. A nominal entry door size describes the product category, not every dimension needed for installation.
Three questions decide the job
Before measuring, answer these:
- Is the existing frame staying? If the jambs are sound, square, and compatible with the new slab, you may only need the slab and hardware.
- Is the opening the size the manufacturer expects? A prehung unit needs clearance for its frame, shims, and adjustment. The rough opening is larger than the door unit.
- Did you measure the slab or the framed hole? Those are different measurement modes, and confusing them is one of the fastest ways to order incorrectly.
A widely used historical benchmark for a replacement entry door in the United States is 36 by 80 inches, with a typical thickness of 1 3/4 inches, but exact standardization doesn't exist across every manufacturer. Industry sizing guidance also shows common entry-door widths from 30 to 45 inches and heights from 71 to 96 inches, which is why field measurement matters before ordering a slab or prehung unit. See the Pella entry-door sizing guide for the relationship between nominal door size, the actual frame, and the rough opening.
Job-site rule: The catalog label tells you what the door is called. Your opening measurements tell you what will actually fit.
A typical 32 by 80 installation and a typical 36 by 80 installation can require different rough-opening dimensions, jamb depths, sill treatments, and shim arrangements. A small error at the header, a bowed jack stud, or a floor plane that has settled can turn a planned Saturday installation into a return trip to the supplier. A useful exterior door installation diagram can help identify the slab, jambs, header, sill, trim, and rough opening before you put numbers on an order.
Choosing Your Measurement Mode Before You Start
Don't pull out the tape until you've decided what you're replacing. There are three distinct measurement modes, and each one answers a different ordering question.
Slab-only replacement
Choose this path when the existing frame is staying in place and is structurally sound. Measure the existing slab itself for width, height, thickness, and bevel, then record hinge locations, hinge size, bore locations, and backset. A slab can be the right nominal size and still fail if its hinges don't align with the existing jamb or if its edge profile doesn't match the frame.
This approach works best when the jambs are plumb, the head is level, the threshold is stable, and the weather seal remains serviceable. It doesn't work well when the frame is rotten, twisted, badly out of square, or leaking around the jamb. In those cases, a new slab may just inherit the old frame's problems.
Prehung replacement in an existing frame
This path requires careful definition because a prehung unit normally includes its own frame. If you're ordering a replacement unit to fit an existing framed space, measure the inside width between jamb faces and the height from the subfloor or finished sill plane to the underside of the head jamb, depending on the manufacturer's instructions.
Check the existing frame before relying on those dimensions. Guidance for existing-frame replacement distinguishes among measuring the slab, the inside frame, and the brick-to-brick opening because the correct method depends on whether the frame is square, sound, and staying in place. The door measurement guidance from Everest is useful when you're deciding whether specialized checks, such as plumb, square, calipers, and bevel measurements, apply to your project.
Full-frame or brick-to-brick replacement
Use this mode when the existing jambs and trim are coming out. Measure the rough opening from framing to framing, including width at multiple points, height at multiple points, wall depth, sill condition, and exterior cladding relationships. Brick-to-brick measurement may be relevant where masonry or exterior trim defines the opening, but it isn't a substitute for understanding the structural rough opening.
| Replacement path | Primary measurement | Main risk |
|---|---|---|
| Slab only | Existing slab and hardware layout | Hinge, bevel, thickness, or frame mismatch |
| Existing-frame unit | Inside jamb opening and frame condition | A frame that isn't square or plumb |
| Full-frame replacement | Rough opening, wall depth, and sill plane | Ordering a unit without enough shim space |

If you're comparing custom sizes, unusual wall conditions, or architectural doors, a Black Badge Doors custom guide can provide useful context before you commit to a standard replacement path. The important point is to match the product's required measurements to the part of the opening that will remain after demolition.
Measuring the Rough Opening Step by Step
For a full-frame replacement, work from the structural opening, not the existing slab. As an example, a 36 by 80 prehung unit may be installed in a rough opening around 38 by 82 1/2 inches, subject to the specific manufacturer's requirements and the condition of the framing.
Start with width
Measure between the inside edges of the vertical rough-opening framing at the top, middle, and bottom. Keep the tape straight and avoid measuring over trim, brickmould, casing, or the old jamb. Record all three readings separately instead of writing down only the smallest or largest number.
A difference of 1/4 to 1/2 inch between points can indicate a racked opening, a bowed stud, or framing that has shifted. The opening's narrowest point controls whether the unit can enter, while the wider points show where shims may be needed.
Measure height from the correct plane
Measure from the subfloor to the underside of the header at the left side, center, and right side. Don't use the top of the door sweep or the top of a loose threshold as your vertical reference. A replacement unit needs a consistent base, and the finished floor may not be level with the subfloor.
Industry measurement guidance commonly calls for checking multiple points and allowing clearance for the frame and shimming. A common exterior-door installation rule allows about 2 1/4 inches of clearance on each side and above the door for the frame and shims. The exact requirement still comes from the unit's installation instructions.
Check wall depth
Measure from the interior drywall edge to the exterior sheathing face, or from the interior jamb reference to the exterior plane specified by the manufacturer. This tells you whether the replacement jamb will sit correctly and whether the brickmould or exterior trim can cover the transition.
| Dimension | Target | Minimum | Maximum | Shim space |
|---|---|---|---|---|
| Rough-opening width | 38 inches | 38 1/4 inches | 38 3/4 inches | About 3/4 inch total |
| Rough-opening height | 82 1/2 inches | 82 1/4 inches | 82 3/4 inches | Adjusted at head and sill |
The tolerances in this example aren't wasted space. They provide room to center the unit, correct minor framing variation, and compress shims without forcing the jamb out of plumb. A rough opening that's too tight leaves no adjustment room. One that's too large may require structural correction rather than random packing.
Jamb Depth, Sill Height, and Square Checks
A door can fit the rough opening and still perform poorly if the supporting measurements are wrong. Jamb depth, sill height, and geometry determine whether the slab sits in the same plane as the weatherstrip and whether the latch meets the strike cleanly.
Confirm the jamb depth
Measure wall depth at several points because drywall, sheathing, furring, and siding can create a nonuniform surface. A typical 2 by 4 wall reads about 4 9/16 inches, while a typical 2 by 6 wall reads about 6 9/16 inches. Those figures are common jamb-depth references, not a guarantee for an older or remodeled wall.
A jamb that's too shallow may leave the interior casing proud of the wall. A jamb that's too deep may sink into the opening or interfere with exterior trim. Check the manufacturer's jamb options before ordering, especially if the wall has added insulation, thick tile, stone veneer, or replacement siding.
Treat the sill as a working surface
Lay a straightedge across the sill and measure down to the finished floor. For a typical 36 by 80 inswing, the sill may sit around 1 1/2 to 2 inches above the subfloor, but the finished floor, threshold design, and accessibility requirements can change the usable height.
Measure the sill from both sides and the center. A settled or sloped sill can leave one corner of the slab too close to the threshold while the opposite corner has an excessive gap. Also record whether the replacement will sit over finished flooring, underlayment, tile, or a transition strip.
Test the opening's geometry
Use a level, a straightedge, and a tape measure. Check both jambs for plumb, the sill for level, and the head for level. Then measure diagonally from opposite corners on both faces of the opening.
| Check | How to measure | Target | Acceptable tolerance |
|---|---|---|---|
| Width | Measure top, middle, and bottom | Consistent opening | Variation identifies bow or rack |
| Height | Measure both sides and center | Consistent vertical plane | Variation identifies header or sill movement |
| Diagonals | Corner to corner in both directions | Matching diagonals | Within 1/4 inch for this typical installation |
| Jambs | Hold level vertically on each side | Plumb | Correct with shims where needed |
| Sill | Hold level across the threshold area | Level | Correct before final fastening |
Keep the door frame's relationship to the wall in mind. A frame can look acceptable from the porch while the interior face is twisted. The door entrance frame reference can help you identify the frame components and understand which surface each measurement describes.
Swing Direction and Handing for Your Door
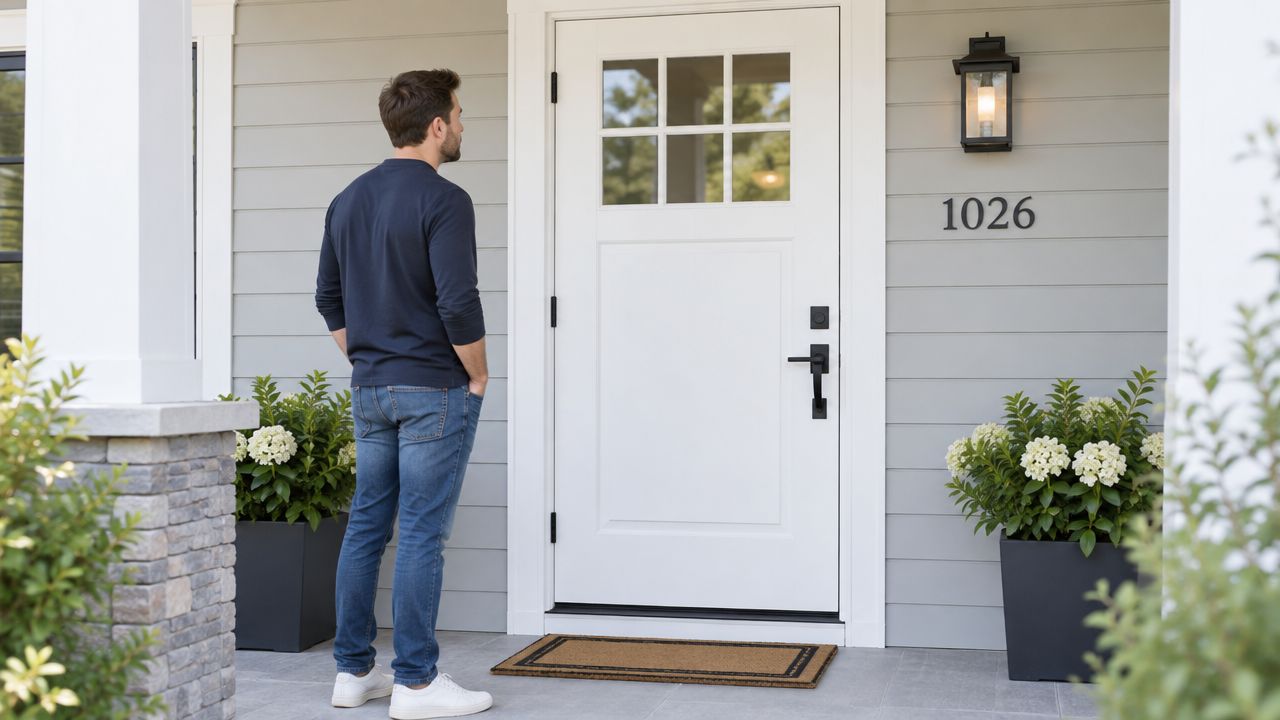
A correctly sized door can still arrive backward if handing is guessed. Stand outside the home on the key side, face the door, and look at the hinge edge. Hinges on your left indicate left-hand. Hinges on your right indicate right-hand.
Next, determine the swing. If the slab moves toward you as you face it from outside, it is an inswing. If it pushes away from you, it is an outswing. Write the complete designation on the order, such as LHI, RHI, LHO, or RHO, rather than relying on a note that says only “right-hand door.”
Look beyond the hinges
For a typical 36 by 80 front entry, an inswing configuration may be common, but you shouldn't assume it. Record the deadbolt side, knob or lever position, storm-door relationship, and the direction of nearby steps or walls.
A porch column, railing, screen door, or narrow landing can prevent the slab from opening to 90 degrees. An outswing can solve an interior clearance problem, but it introduces different weather exposure, hinge protection, and egress considerations. Review the hardware and hinge requirements in an outswing door hinge guide before changing the existing direction.
Watch the short demonstration below after you've identified the outside face and hinge side. It can reinforce the difference between handing and swing, but your written site notes should control the order.
Write handing and swing on the same page as the rough-opening dimensions. Separating those notes from the order form creates an avoidable transcription error.
Why a Quarter Inch Can Sink the Whole Job
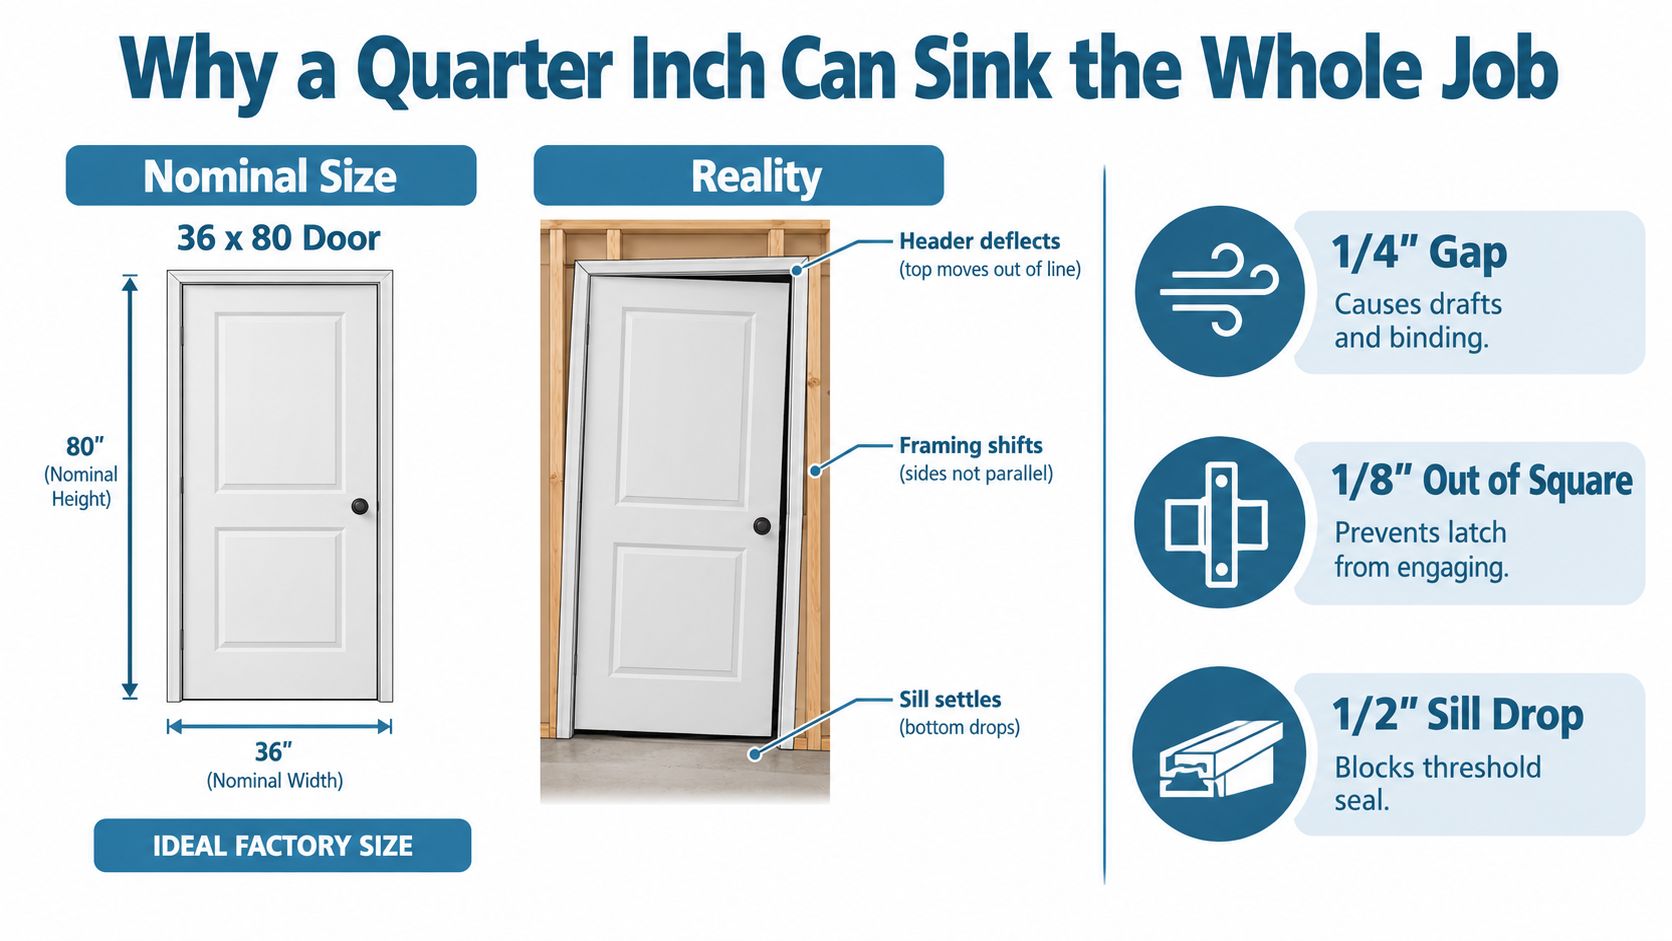
A nominal 36 by 80 label doesn't mean the existing opening is a perfect rectangle. Older framing can move, the sill can settle, the header can deflect, and jambs can bow inward. The door may match the catalog size while the opening fails the compatibility check.
Replacement guidance emphasizes measuring at several points because an opening can be out of square. It also distinguishes between the largest and smallest readings depending on whether you're fitting an existing frame or ordering a rough-opening-based unit. The technical measuring guidance from Simpson Door covers conditions that simple width-and-height instructions often leave out, including beveled edges, sill height, sweeps, trim, and brickmould.
Small differences create real symptoms
A quarter-inch variation can change how the unit seats and seals. A tight middle section caused by a bowed jamb can pinch the slab even when the top measurement looks correct. A low corner at the sill can make the slab land unevenly, leaving the latch and strike out of alignment.
The opening should be evaluated as a system:
- Slab and frame: The slab must match the existing or new jamb's hinge, bevel, thickness, and clearance requirements.
- Frame and rough opening: The frame needs room to center and shim without being forced out of plumb.
- Sill and threshold: The threshold needs a stable, level plane and enough height for the weather seal.
- Trim and cladding: Casing and brickmould must be excluded from the structural measurement unless the manufacturer's instructions say otherwise.
Don't use a door sweep as the bottom of the door for a height measurement. Don't include removable trim in the rough-opening width. Don't average three measurements and hide a problem. The largest and smallest readings tell you where the opening needs correction or where the unit needs carefully placed shims.
A measurement isn't successful because it matches the product label. It's successful when the door, frame, opening, sill, and weather seal work together.
Final Measurement Checklist Before You Order
Put the measurements on paper before you open a product page. A manufacturer or installer needs more than one width and one height, especially when the project involves an older frame or a full-frame replacement.
Record the opening
Write the width at the top, middle, and bottom, followed by the height at the left, center, and right. For a rough-opening-based 36 by 80 prehung unit, record the readings to the nearest 1/8 inch and preserve the variation instead of reducing it to one number.
Then add the supporting dimensions:
- Jamb depth: Record the wall or jamb depth within 1/4 inch, including changes caused by drywall, tile, siding, or sheathing.
- Sill and threshold: Note the sill height, level condition, finished-floor relationship, threshold width, and any transition that will remain.
- Head clearance: Record the available space above the slab and check that the header doesn't sag into the frame path.
- Geometry: Measure both diagonals. For the typical 36 by 80 installation, aim for a diagonal difference under 1/4 inch.
- Handing and swing: Write LHI, RHI, LHO, or RHO from the exterior view, then note lock, storm-door, porch, and landing conditions.
- Slab details: For a slab-only order, record the actual slab width, height, thickness, hinge locations, hinge size, bevel, bore locations, and backset.
Know when to stop
Call an experienced installer before ordering if the diagonal variance is above 3/8 inch, or if the rough opening is more than 1 inch larger or smaller than the nominal door size. Those conditions can indicate structural movement, inadequate framing, or a project that needs rework rather than a simple replacement.
If you're comparing door and window packages, installer-grade window products can also help you evaluate how supplier specifications are presented across openings. Use the same discipline here: compare the product's required dimensions with the actual opening, not with the old door's label.

Before you click buy, confirm one sentence that matches the product:
- Slab-only order: “I am keeping the existing frame, and the new slab matches its dimensions, hinges, bevel, thickness, and hardware layout.”
- Prehung order: “I am replacing the unit and have measured the opening, jamb depth, sill, height, width, swing, handing, and shim requirements.”
- Frame-only or full-frame order: “The existing frame is coming out, and the new frame is specified for the verified rough opening and wall depth.”
If those statements don't describe your project accurately, don't order yet. Take clear photos of the exterior and interior frame, save every measurement, and have the product requirements checked against the opening.
Breaking Glass Co. supplies and installs residential and commercial doors, including fiberglass entry doors, and can coordinate measurement, ordering, installation, quotes, and warranty support. Visit Breaking Glass Co. with your opening dimensions and project photos to discuss the right replacement path before the wrong unit arrives.